

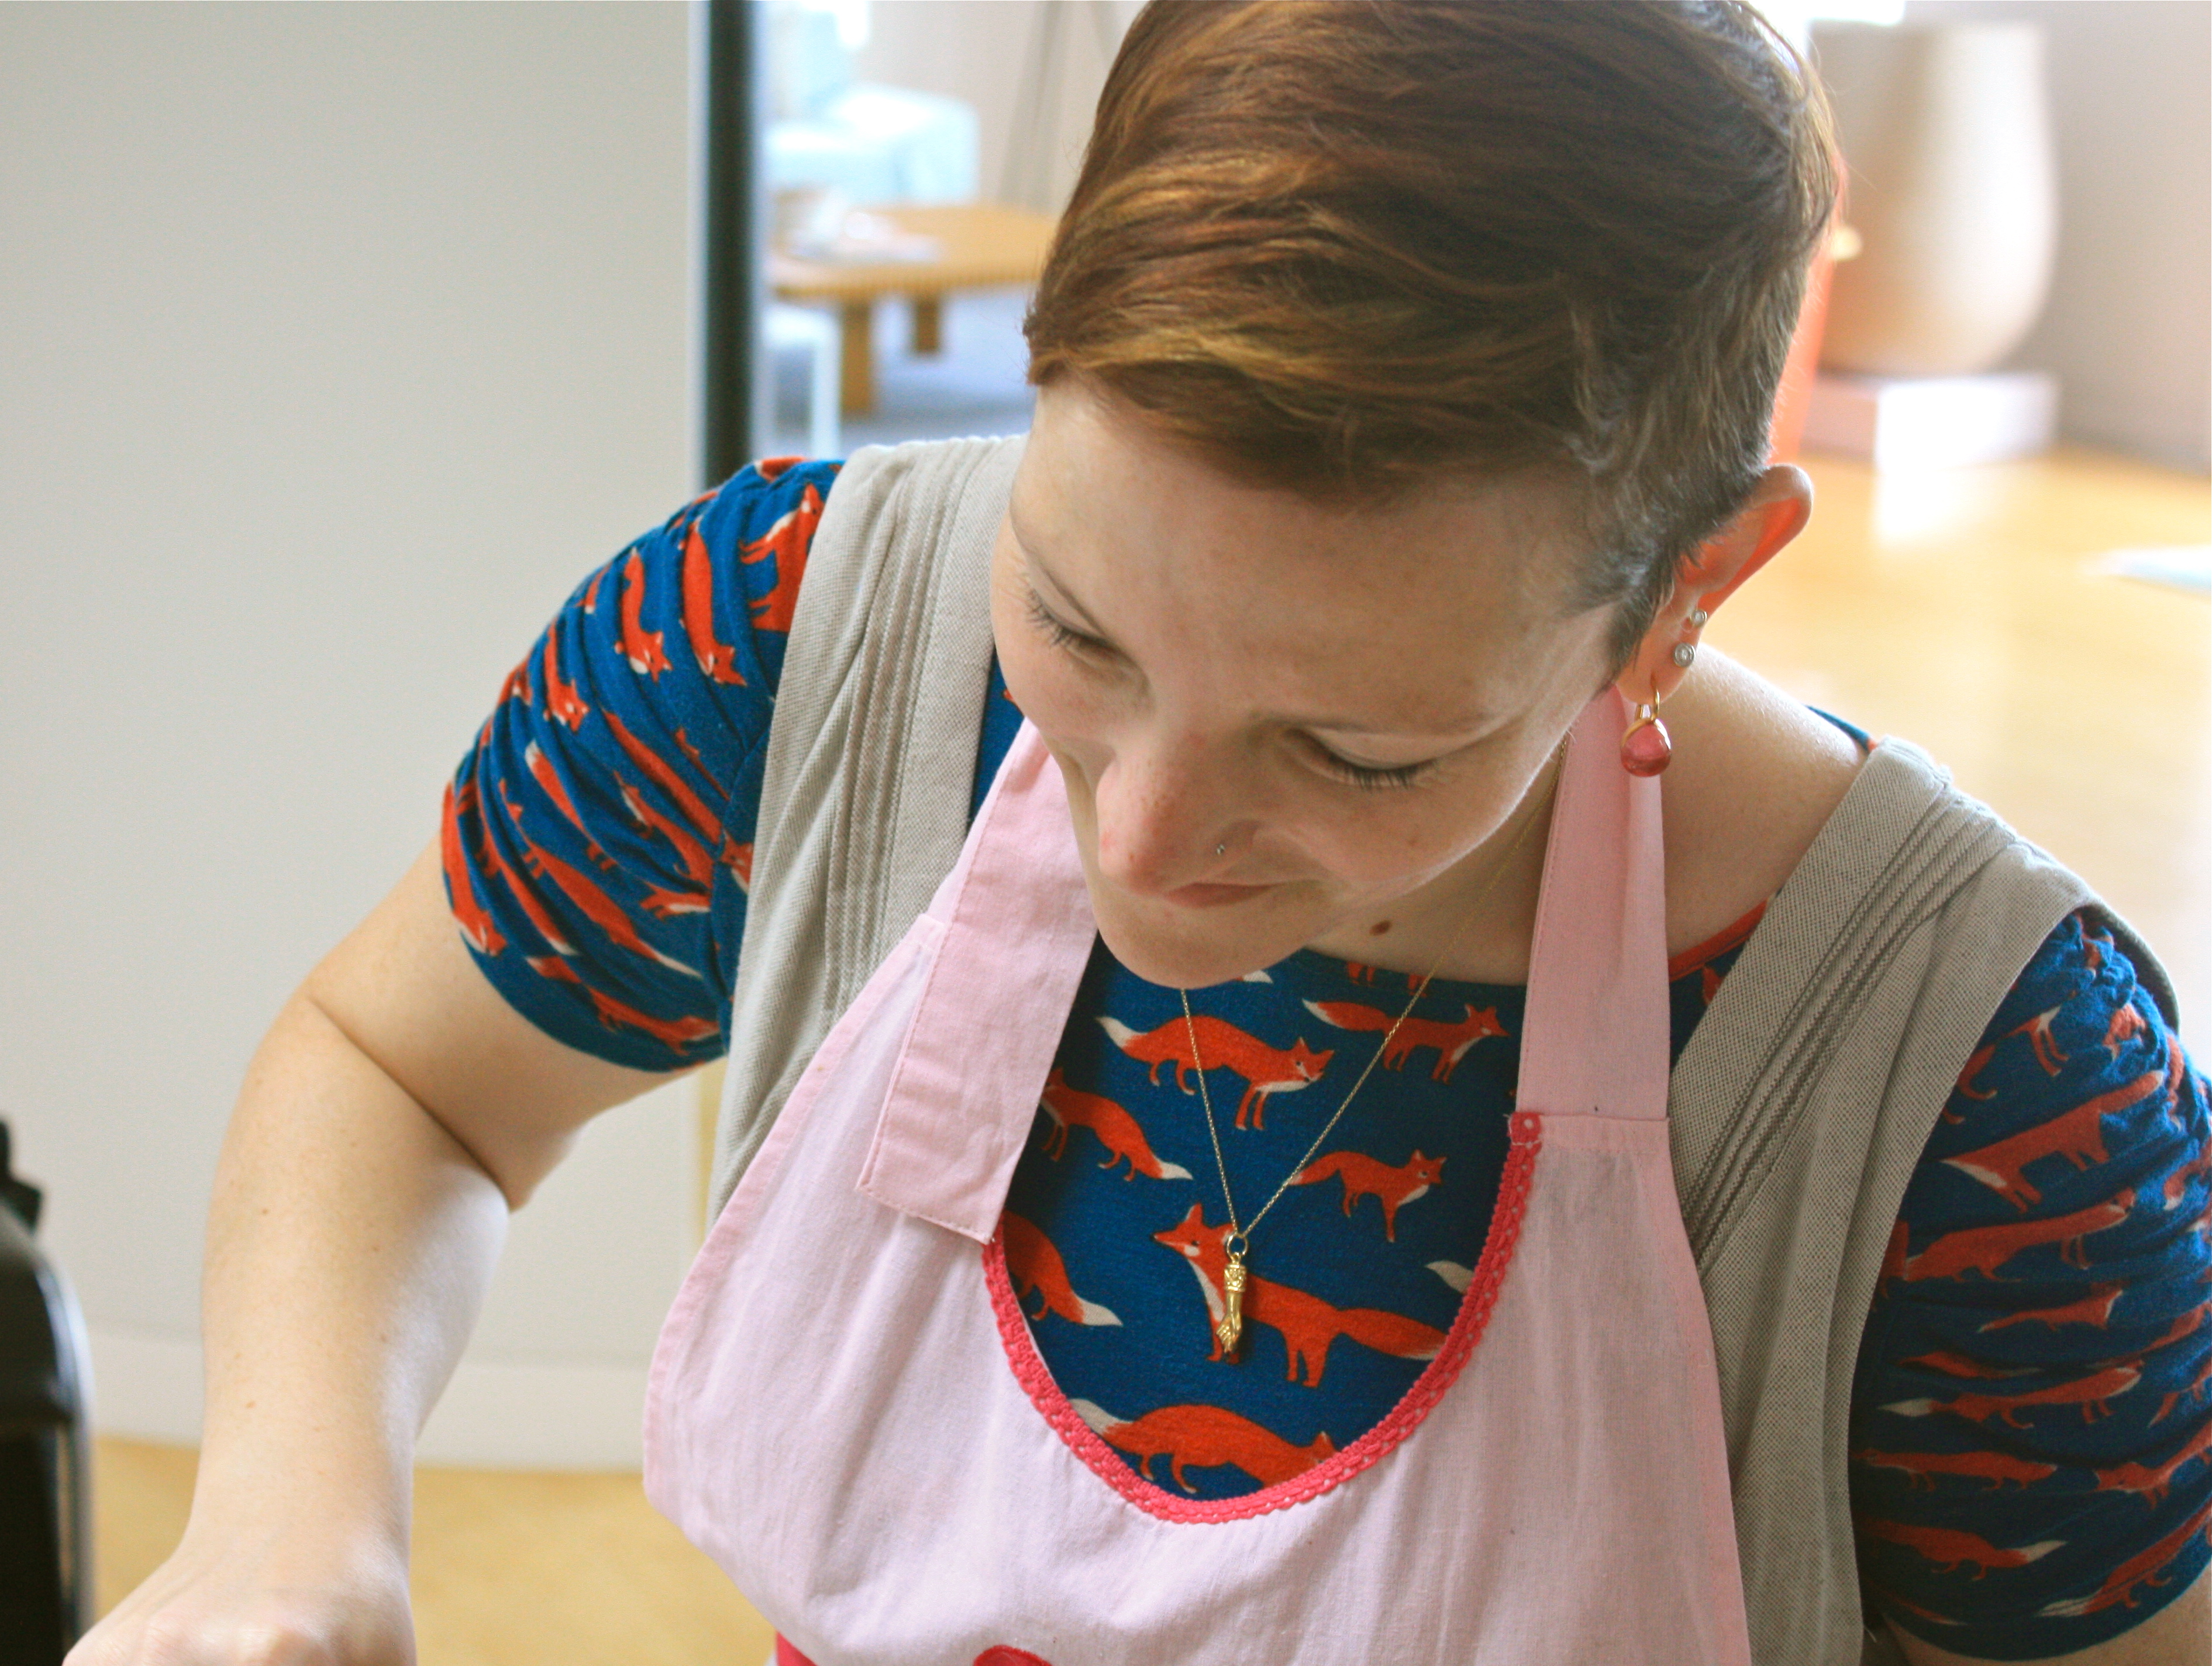
When my sister told me that her daughter, who turned three last week, had requested three cakes for her birthday party, I immediately volunteered to bake one of them. I adore my niece and nephew and have had a blast getting to know them better since moving back from London, but I still see them rarely enough that any opportunity to impress them is worth jumping on. It only got better when my sister told me the only other request my niece had made: that the party be 'a monkey party'.
I remembered a cake I'd seen on Smitten Kitchen, years back, a monkey face that looked surprisingly easy to put together. A quick google confirmed my suspicions that this was something I could definitely handle, and I spent the rest of the day at work printing recipes, doubling and tripling ingredient lists, and blocking off the day before the party in my phone calendar. I was going to go all out this time.
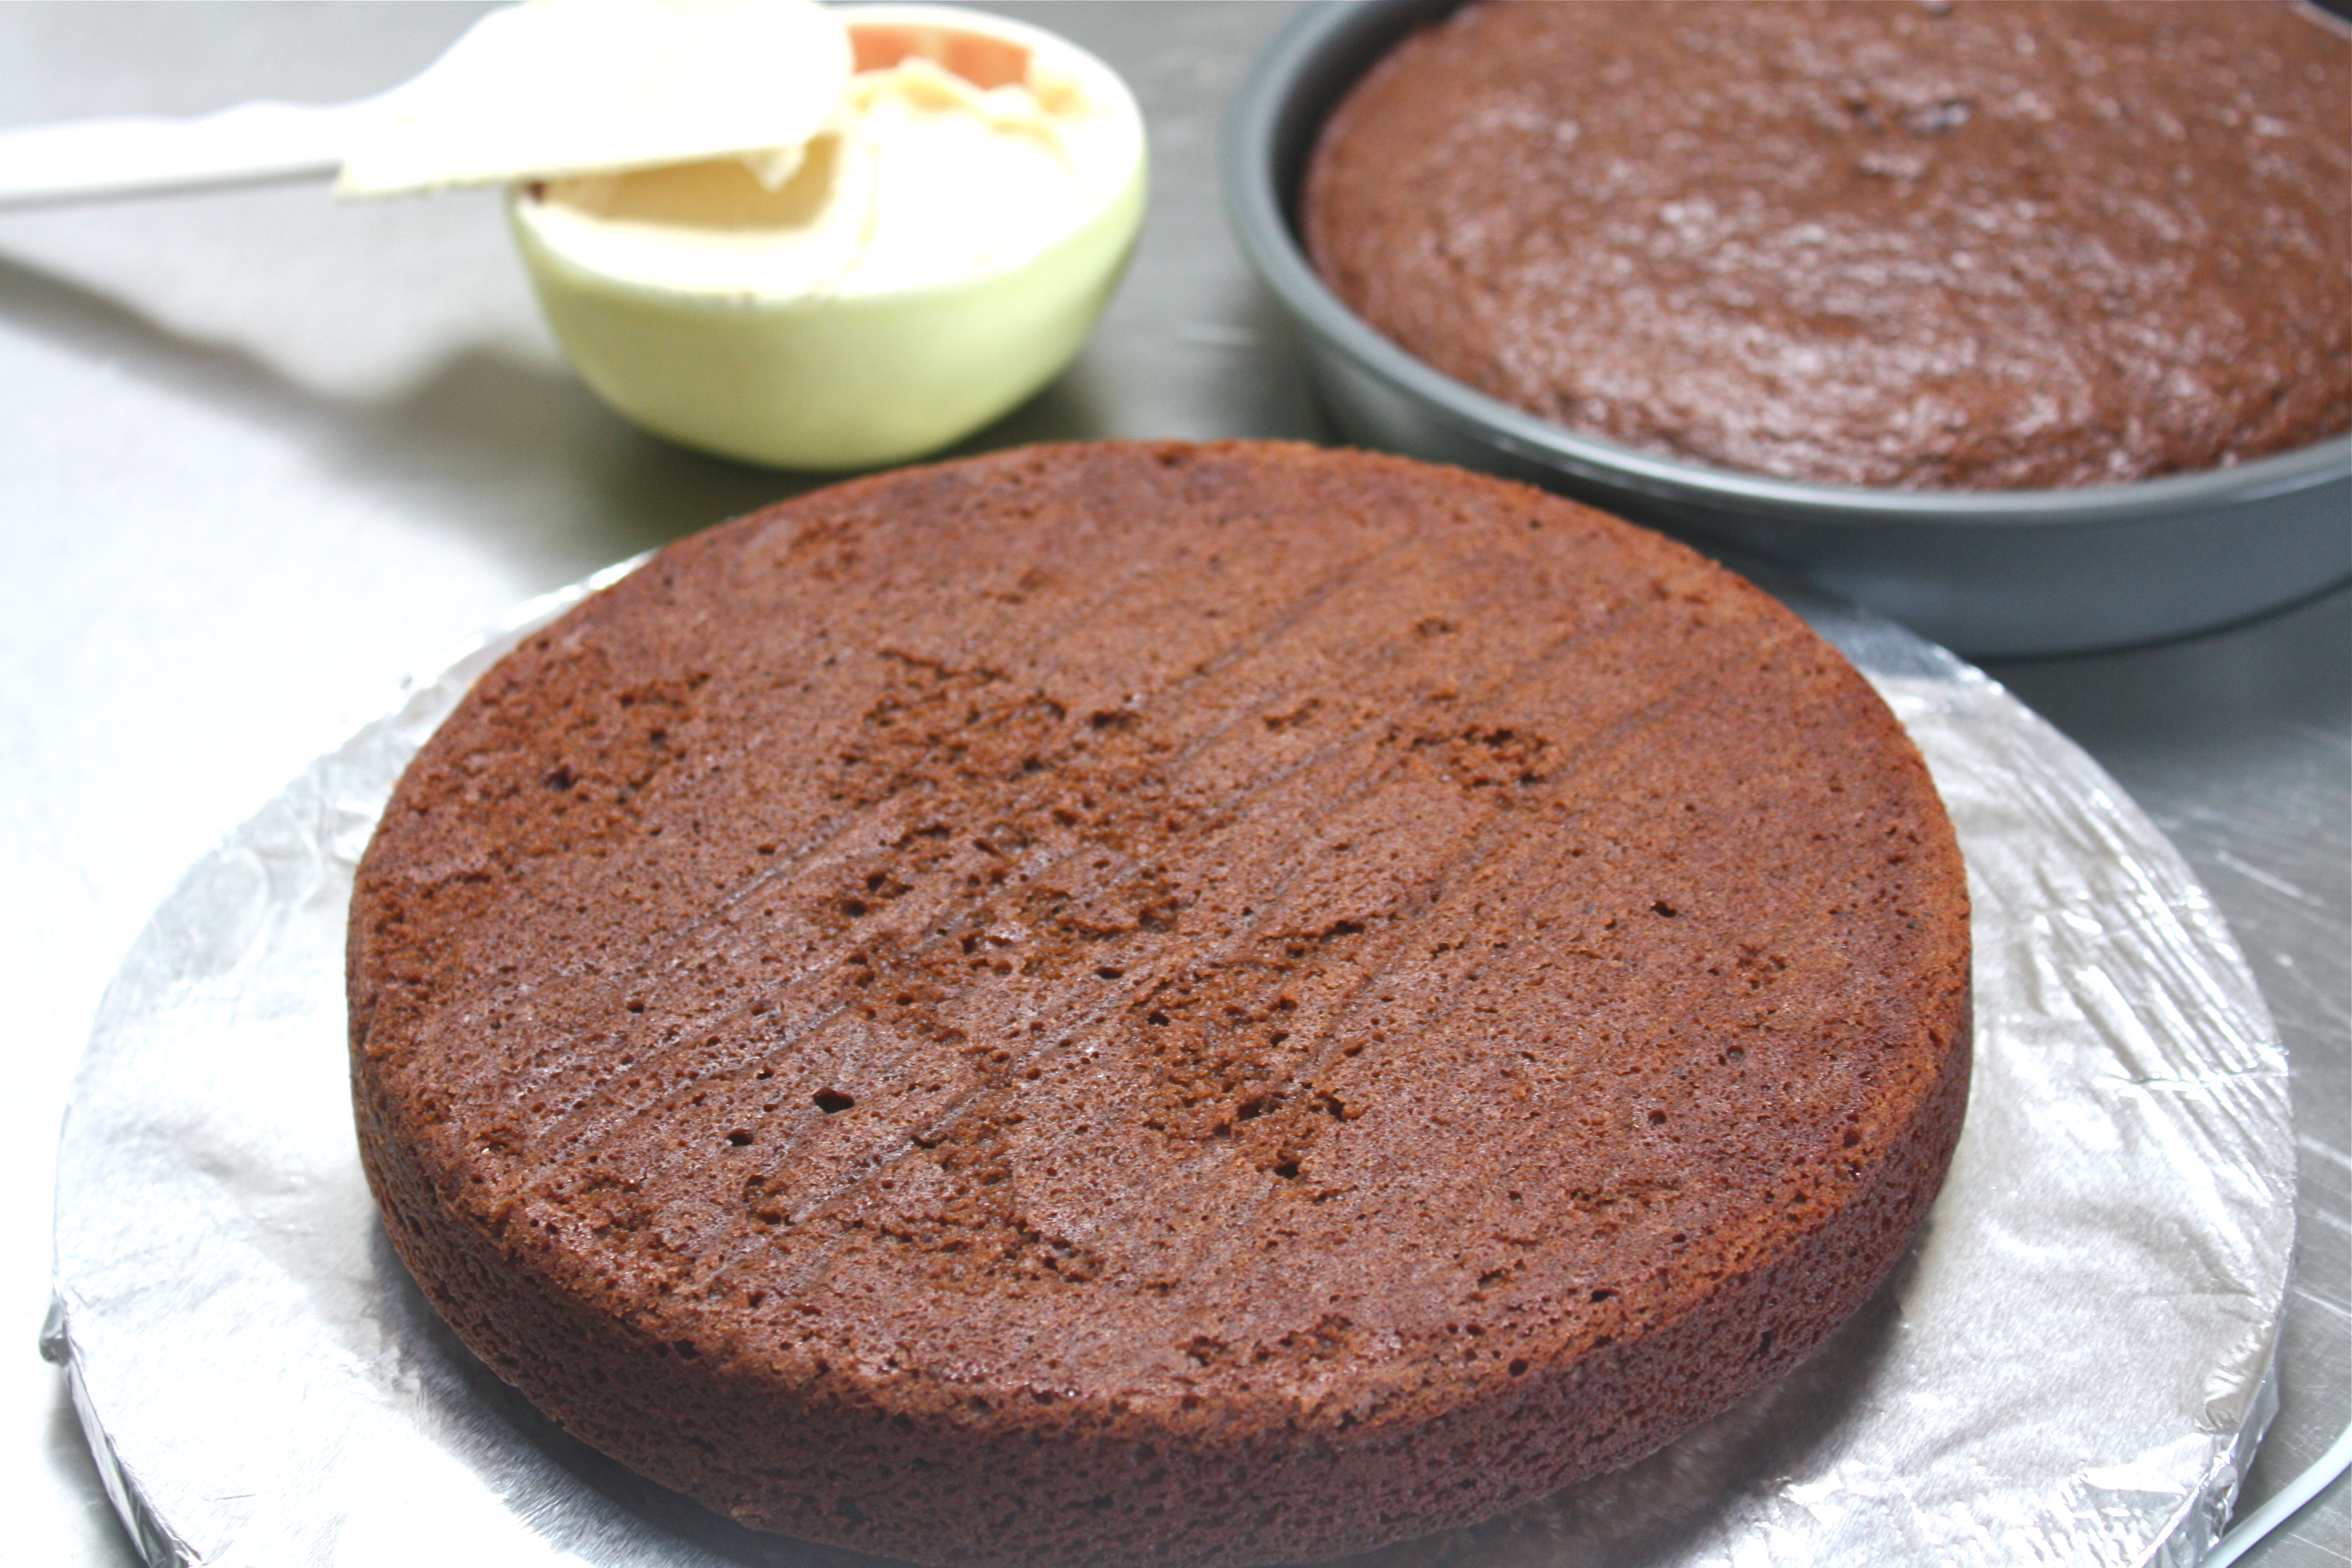
Amazingly, although I was joined by the same distracting photographer/assistant as on the fateful day of pie-baking, the cake layers turned out perfectly. I was off to an excellent start, and I was beyond relieved; I figured I could always remake the frosting if something went wrong, but re-baking and -cooling the layers would have been a much more time-consuming process. While my cakes cooled, my lovely assistant and I walked down the hill to buy a card, and, in classic fashion, I wound up buying about nine cards and another gift – what can I say? I like to spoil the kiddos in my life.
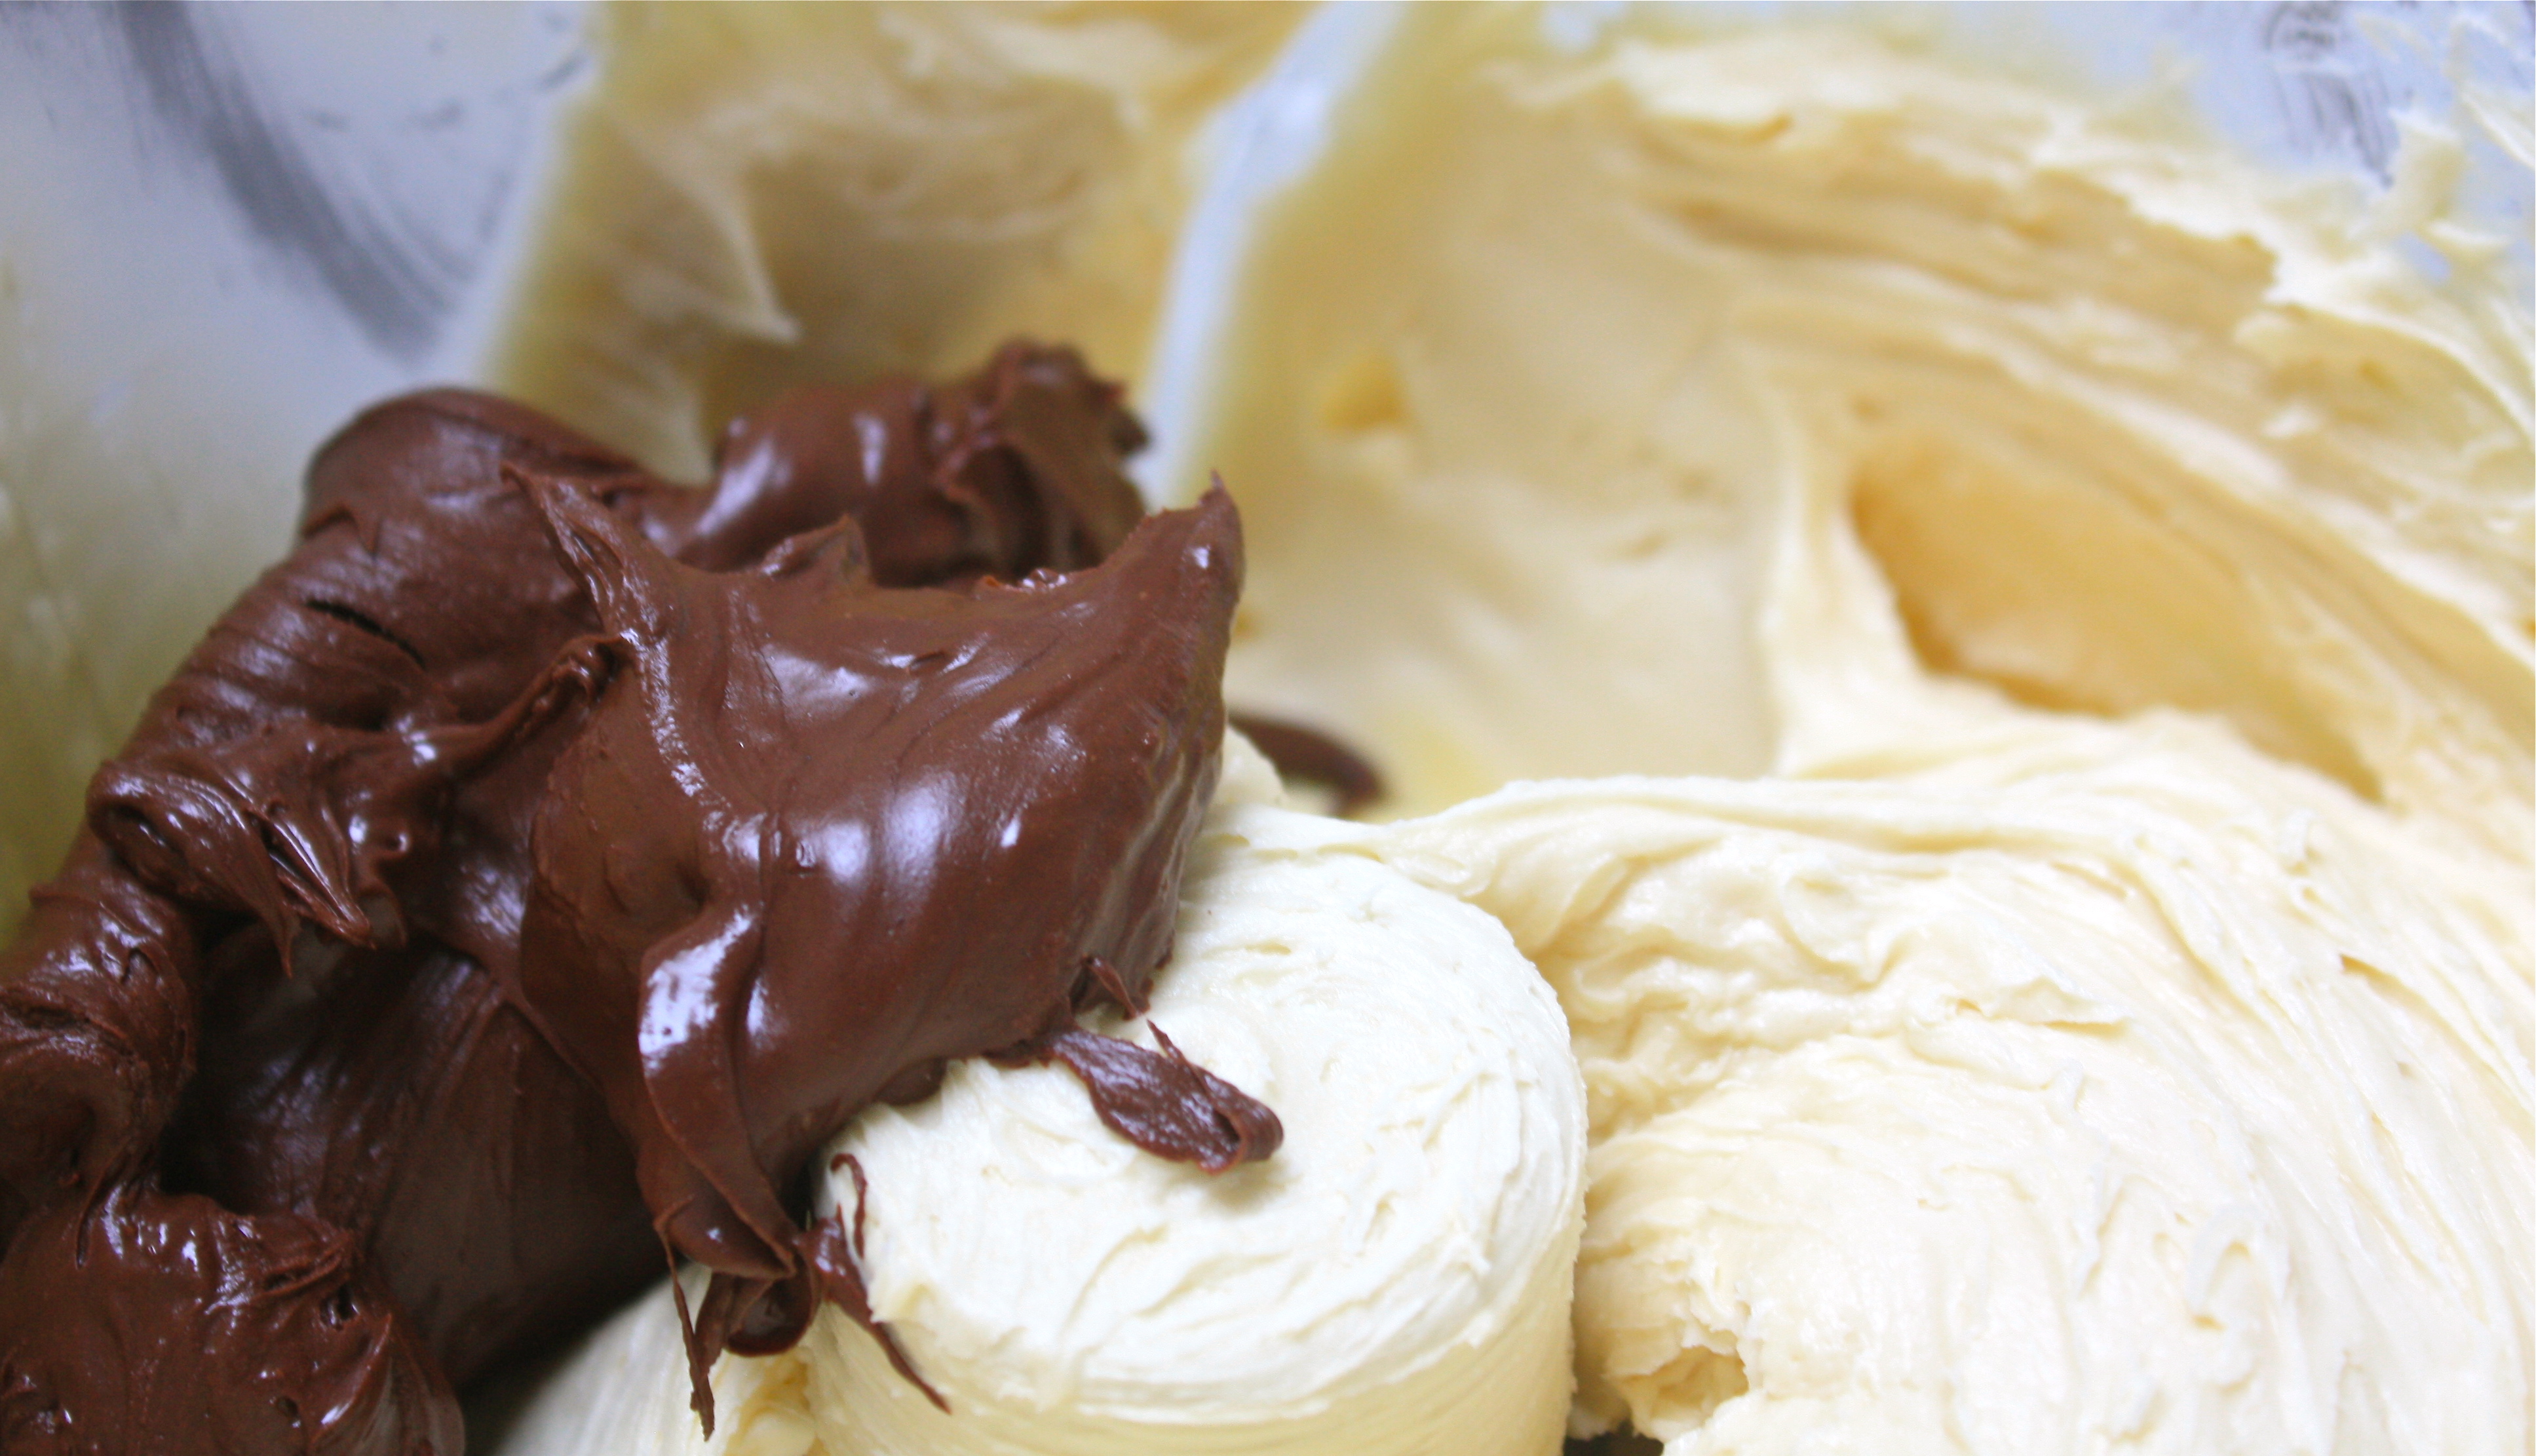
Once the layers were cooled and we had recovered from walking back up the monstrous hill laden with gifts, I made the frosting – now, here I messed it up, as expected, but it wasn't a disaster. The recipe called for the use of a food processor, and as a stubborn bowl-and-wooden-spoon kind of a gal, I am pretty clumsy with these fancier kitchen things. I usually make a mess, and sometimes I screw up my recipe or even the machine itself (luckily that last one has been a very rare occurrence); this time I just made a mess, and then another one, and then another one. I literally had to pull the ingredients back out of the food processor three times because I couldn't seem to get the order of boatloads of powdered sugar and butter and the blade right. Anyway, I got there in the end, and the frosting came out delicious and creamy.
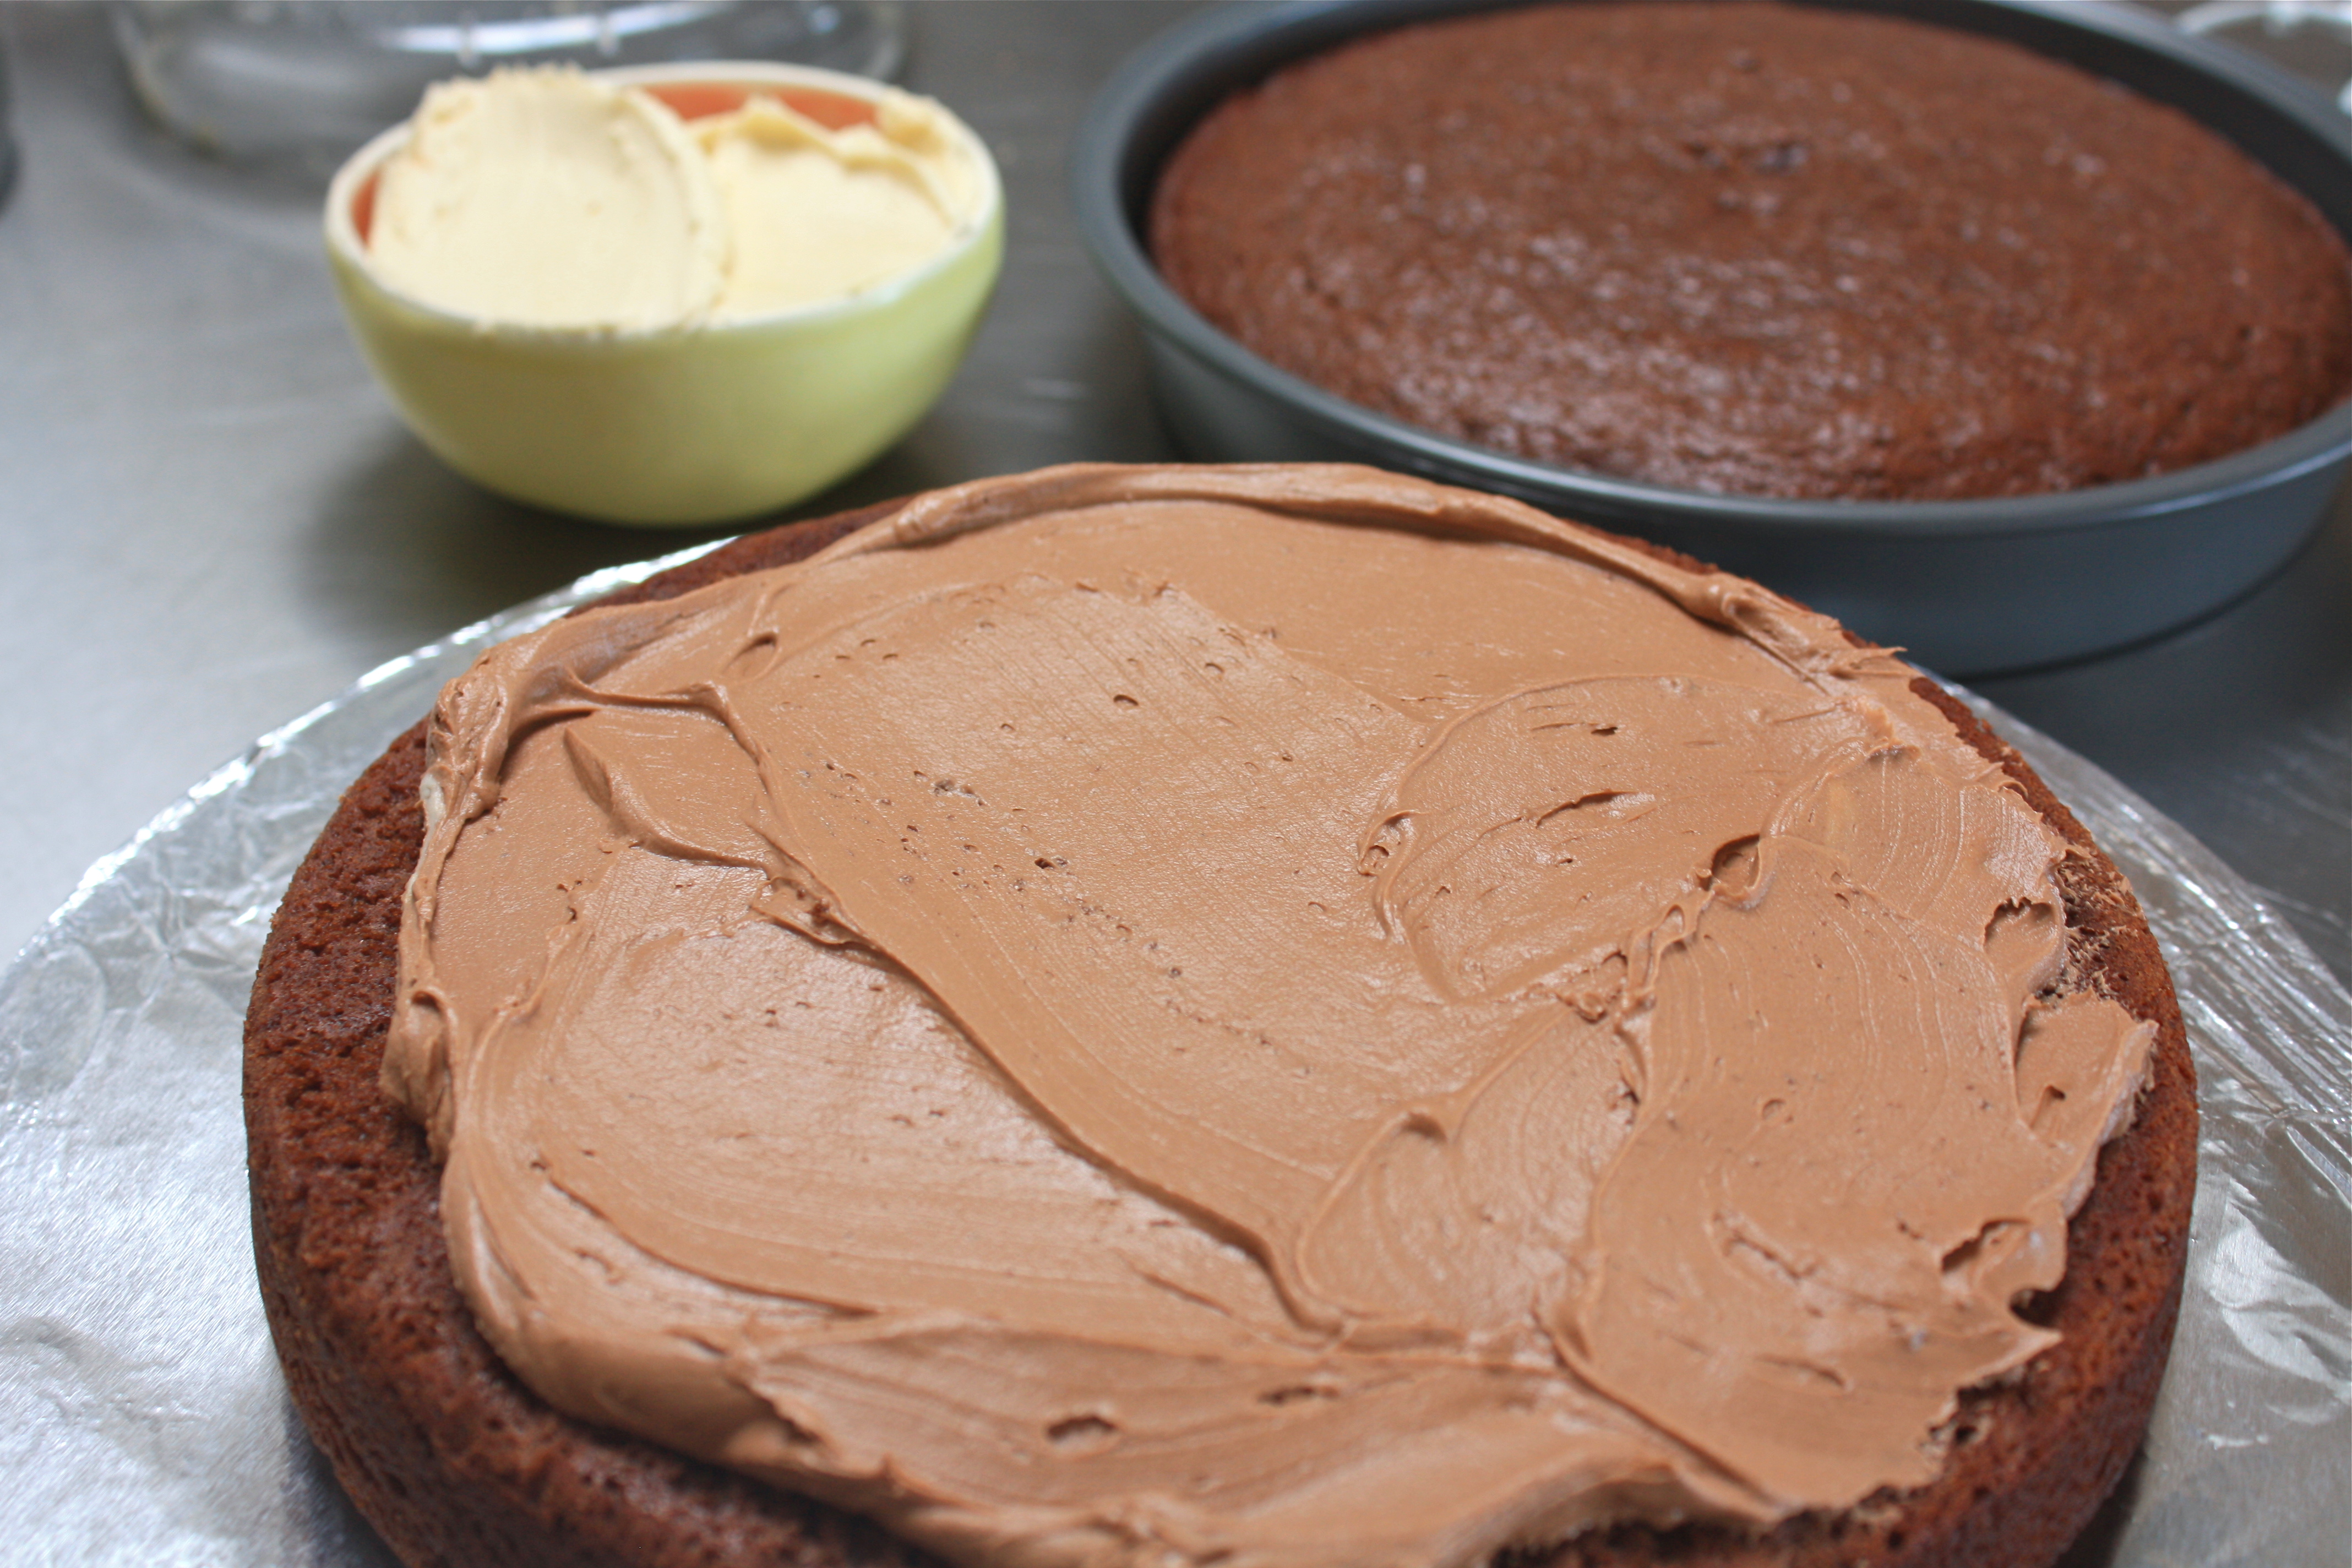
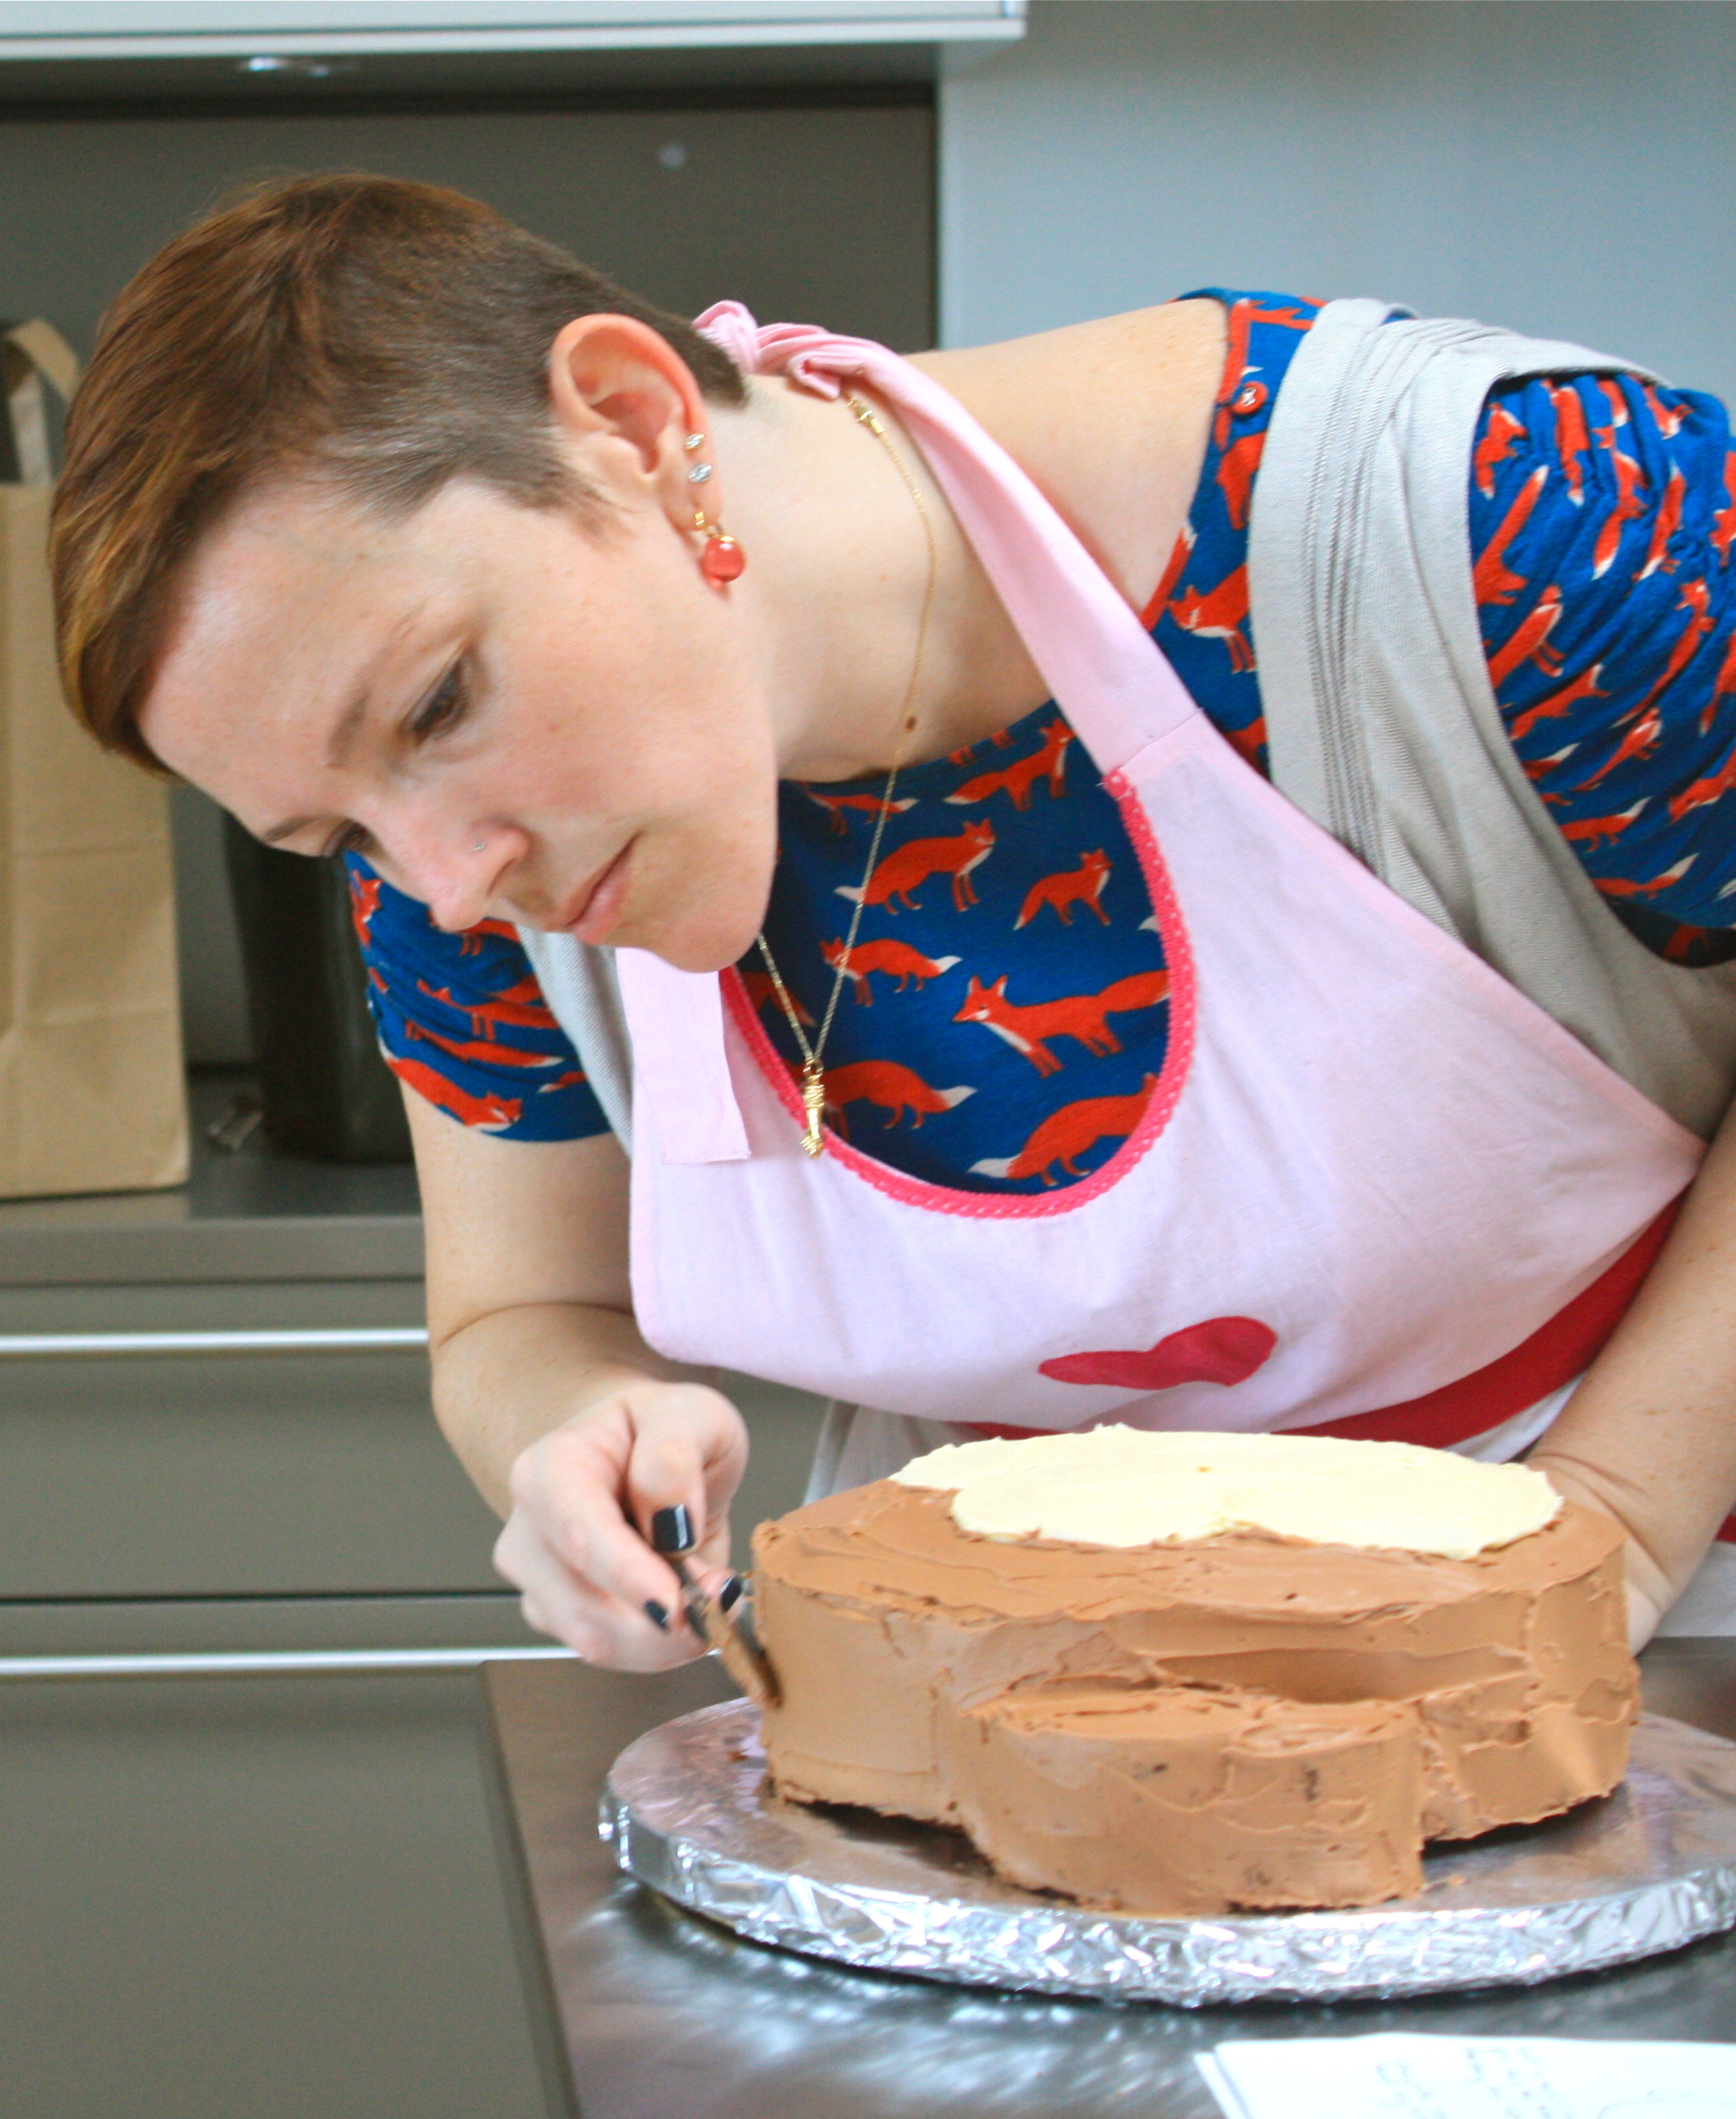
Assembly was the easy part; all I had to stress over was reserving enough frosting for the decorations. I got the main layers set up and covered with a crumb layer pretty quickly.
Then there were the ears to cut, attach, and frost. With a little help from my trusty assistant, I decided on the bigger ears, and glued them to the sides of the cake with some frosting.
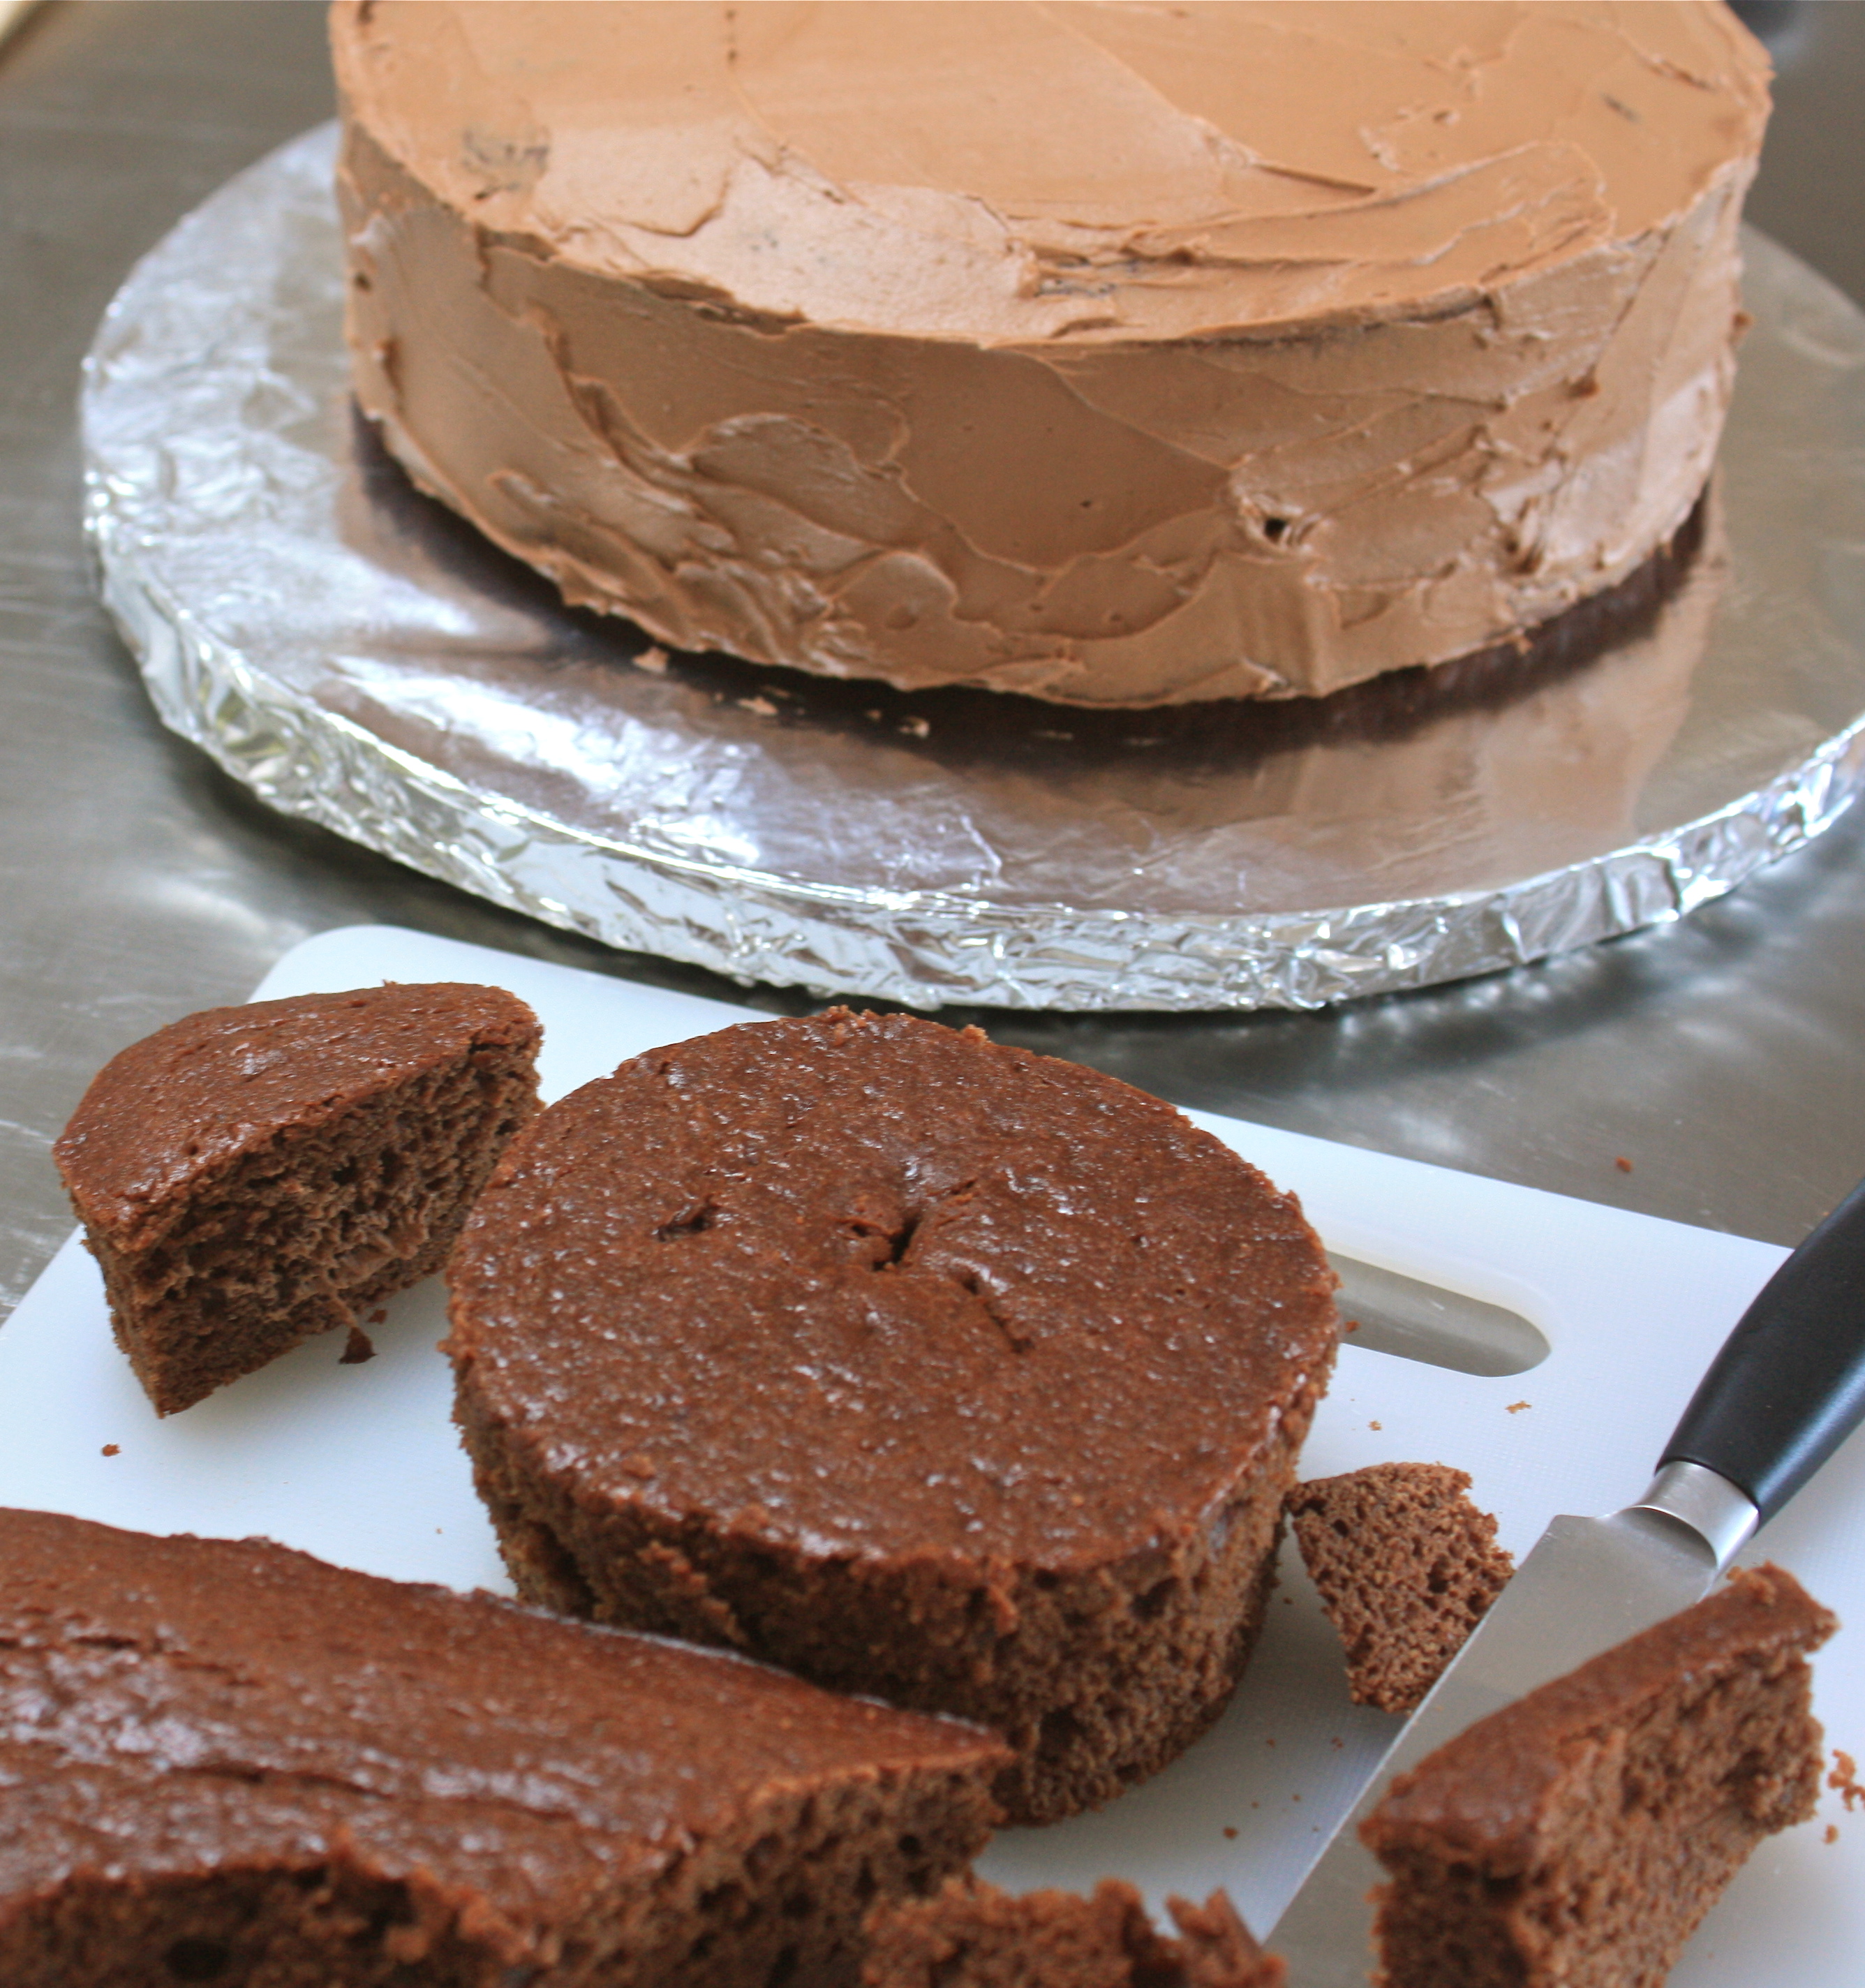
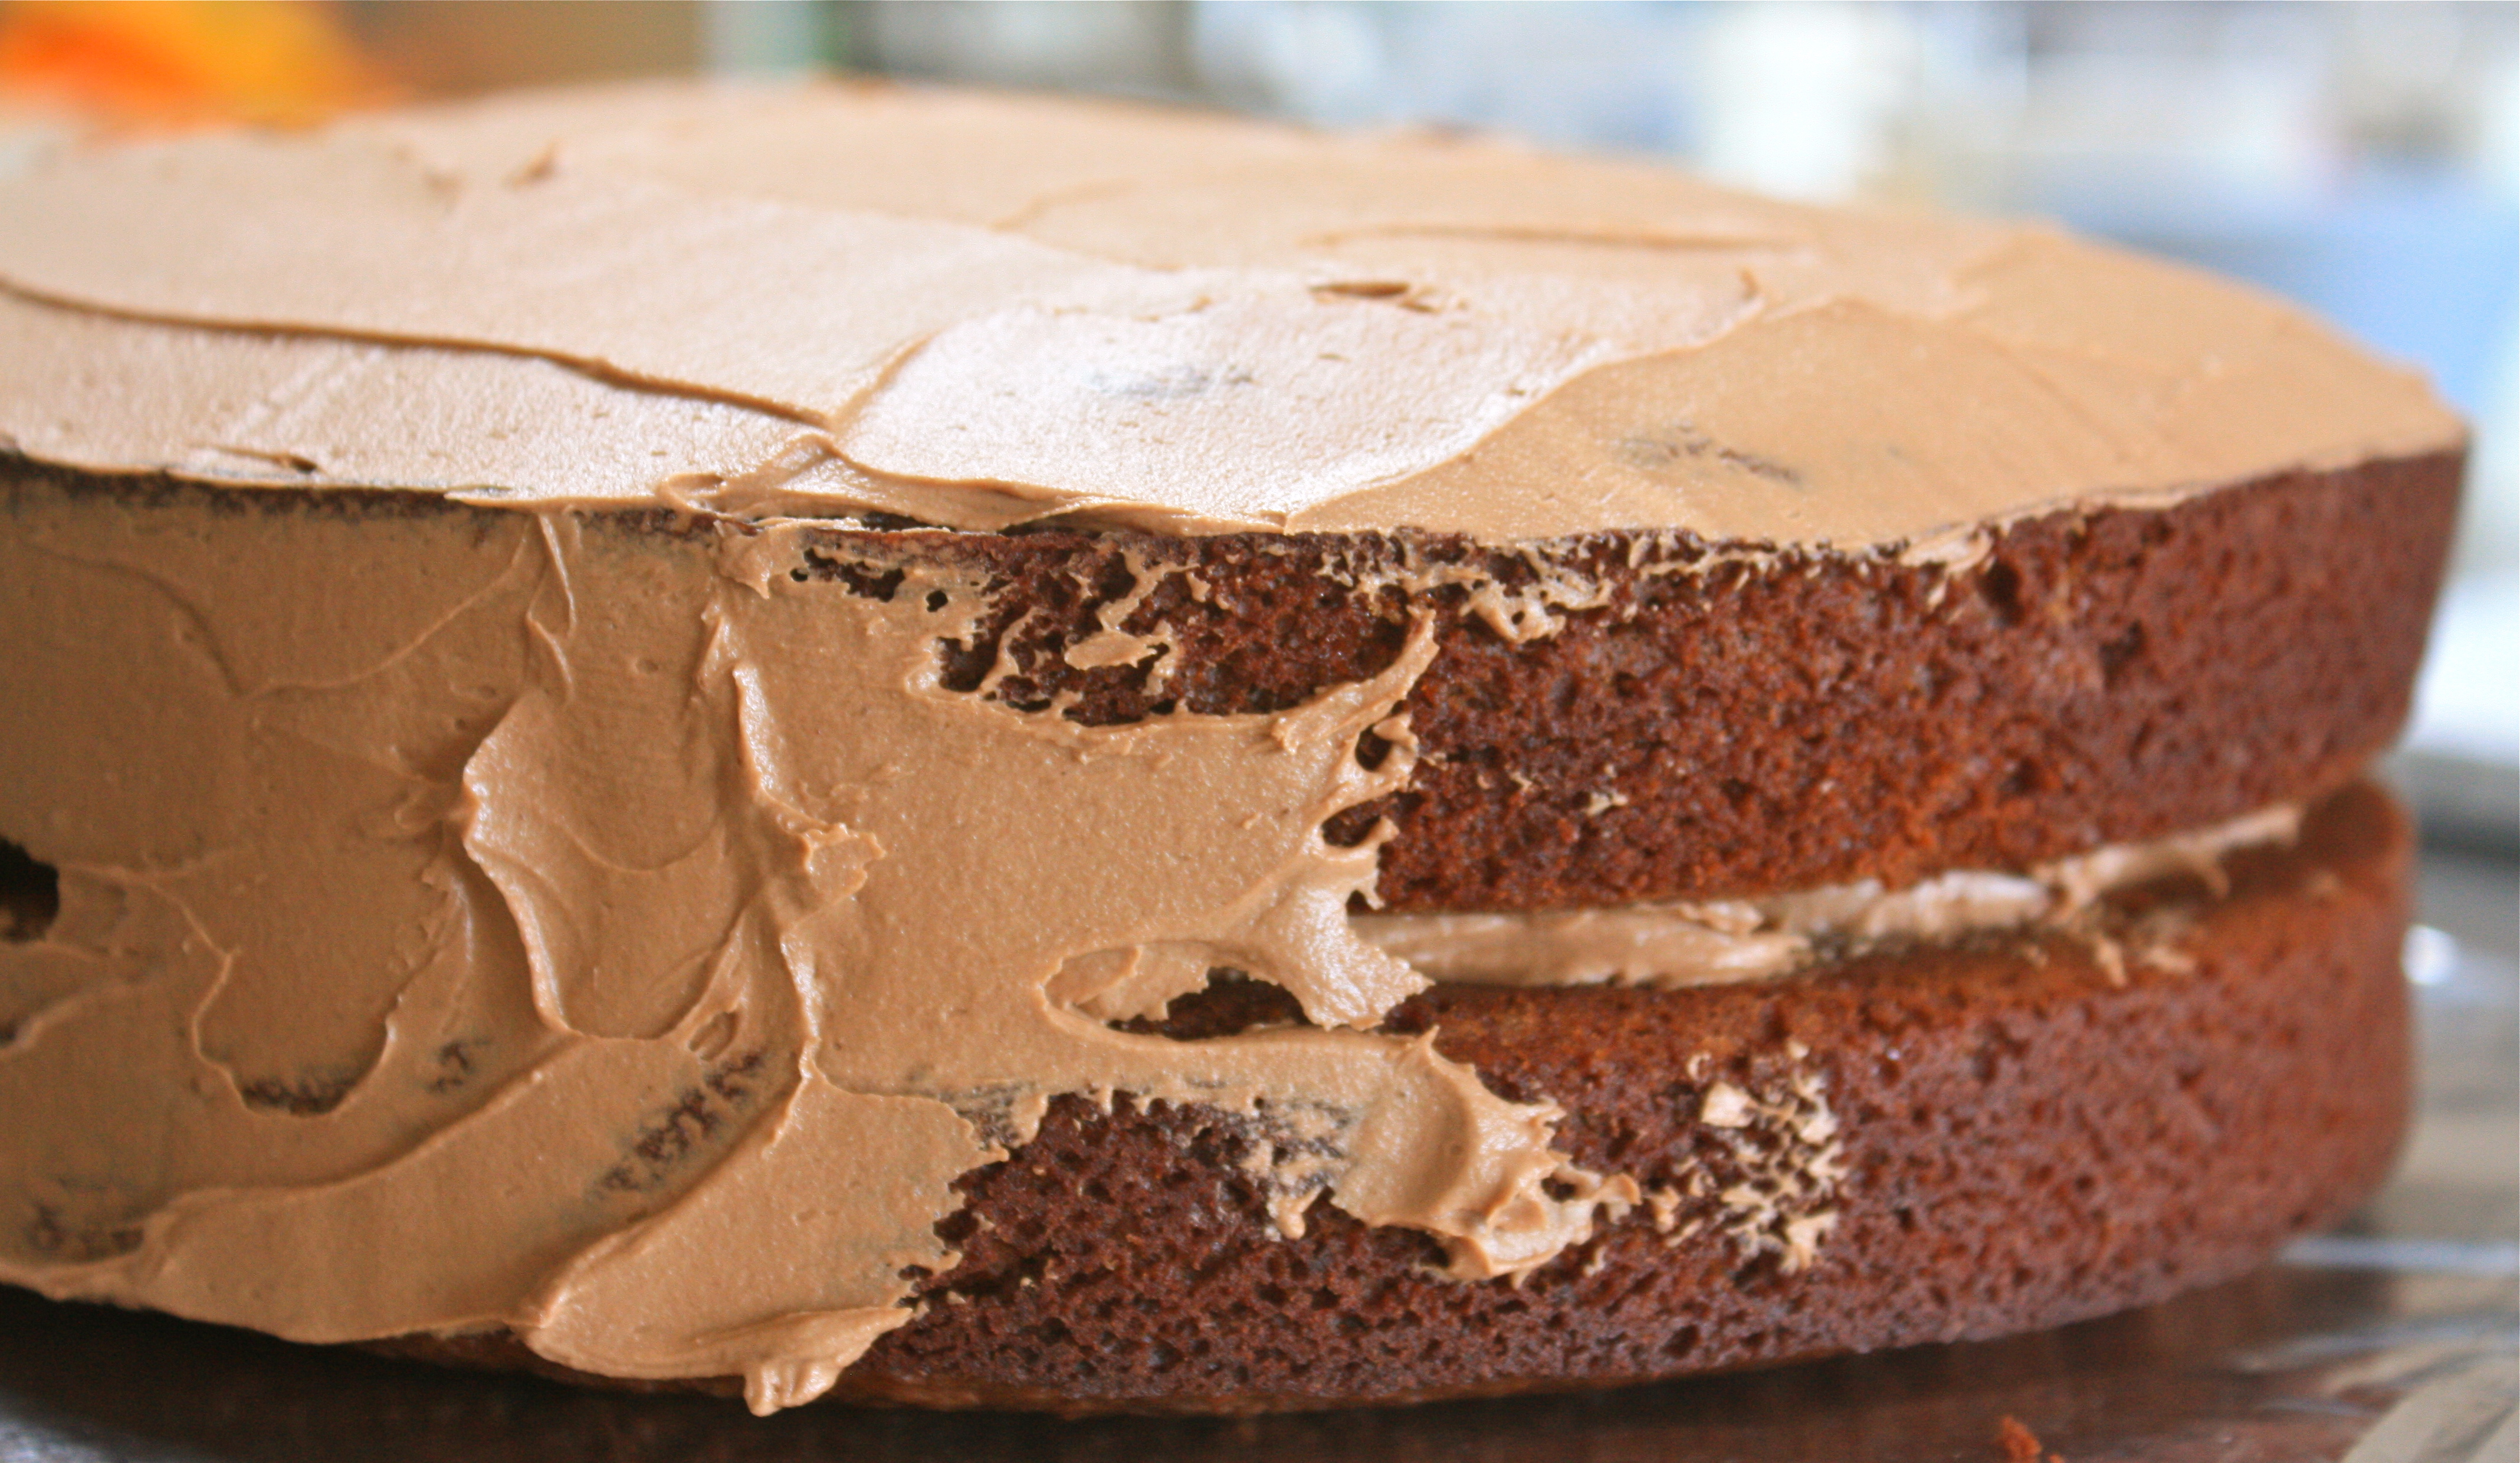
The ear crumb layer was a bit trickier, because the raw cut edges lost a lot of cake with every swipe, but I got there in the end, and it was already starting to look like a little monkey face! Plus, it smelled divine.
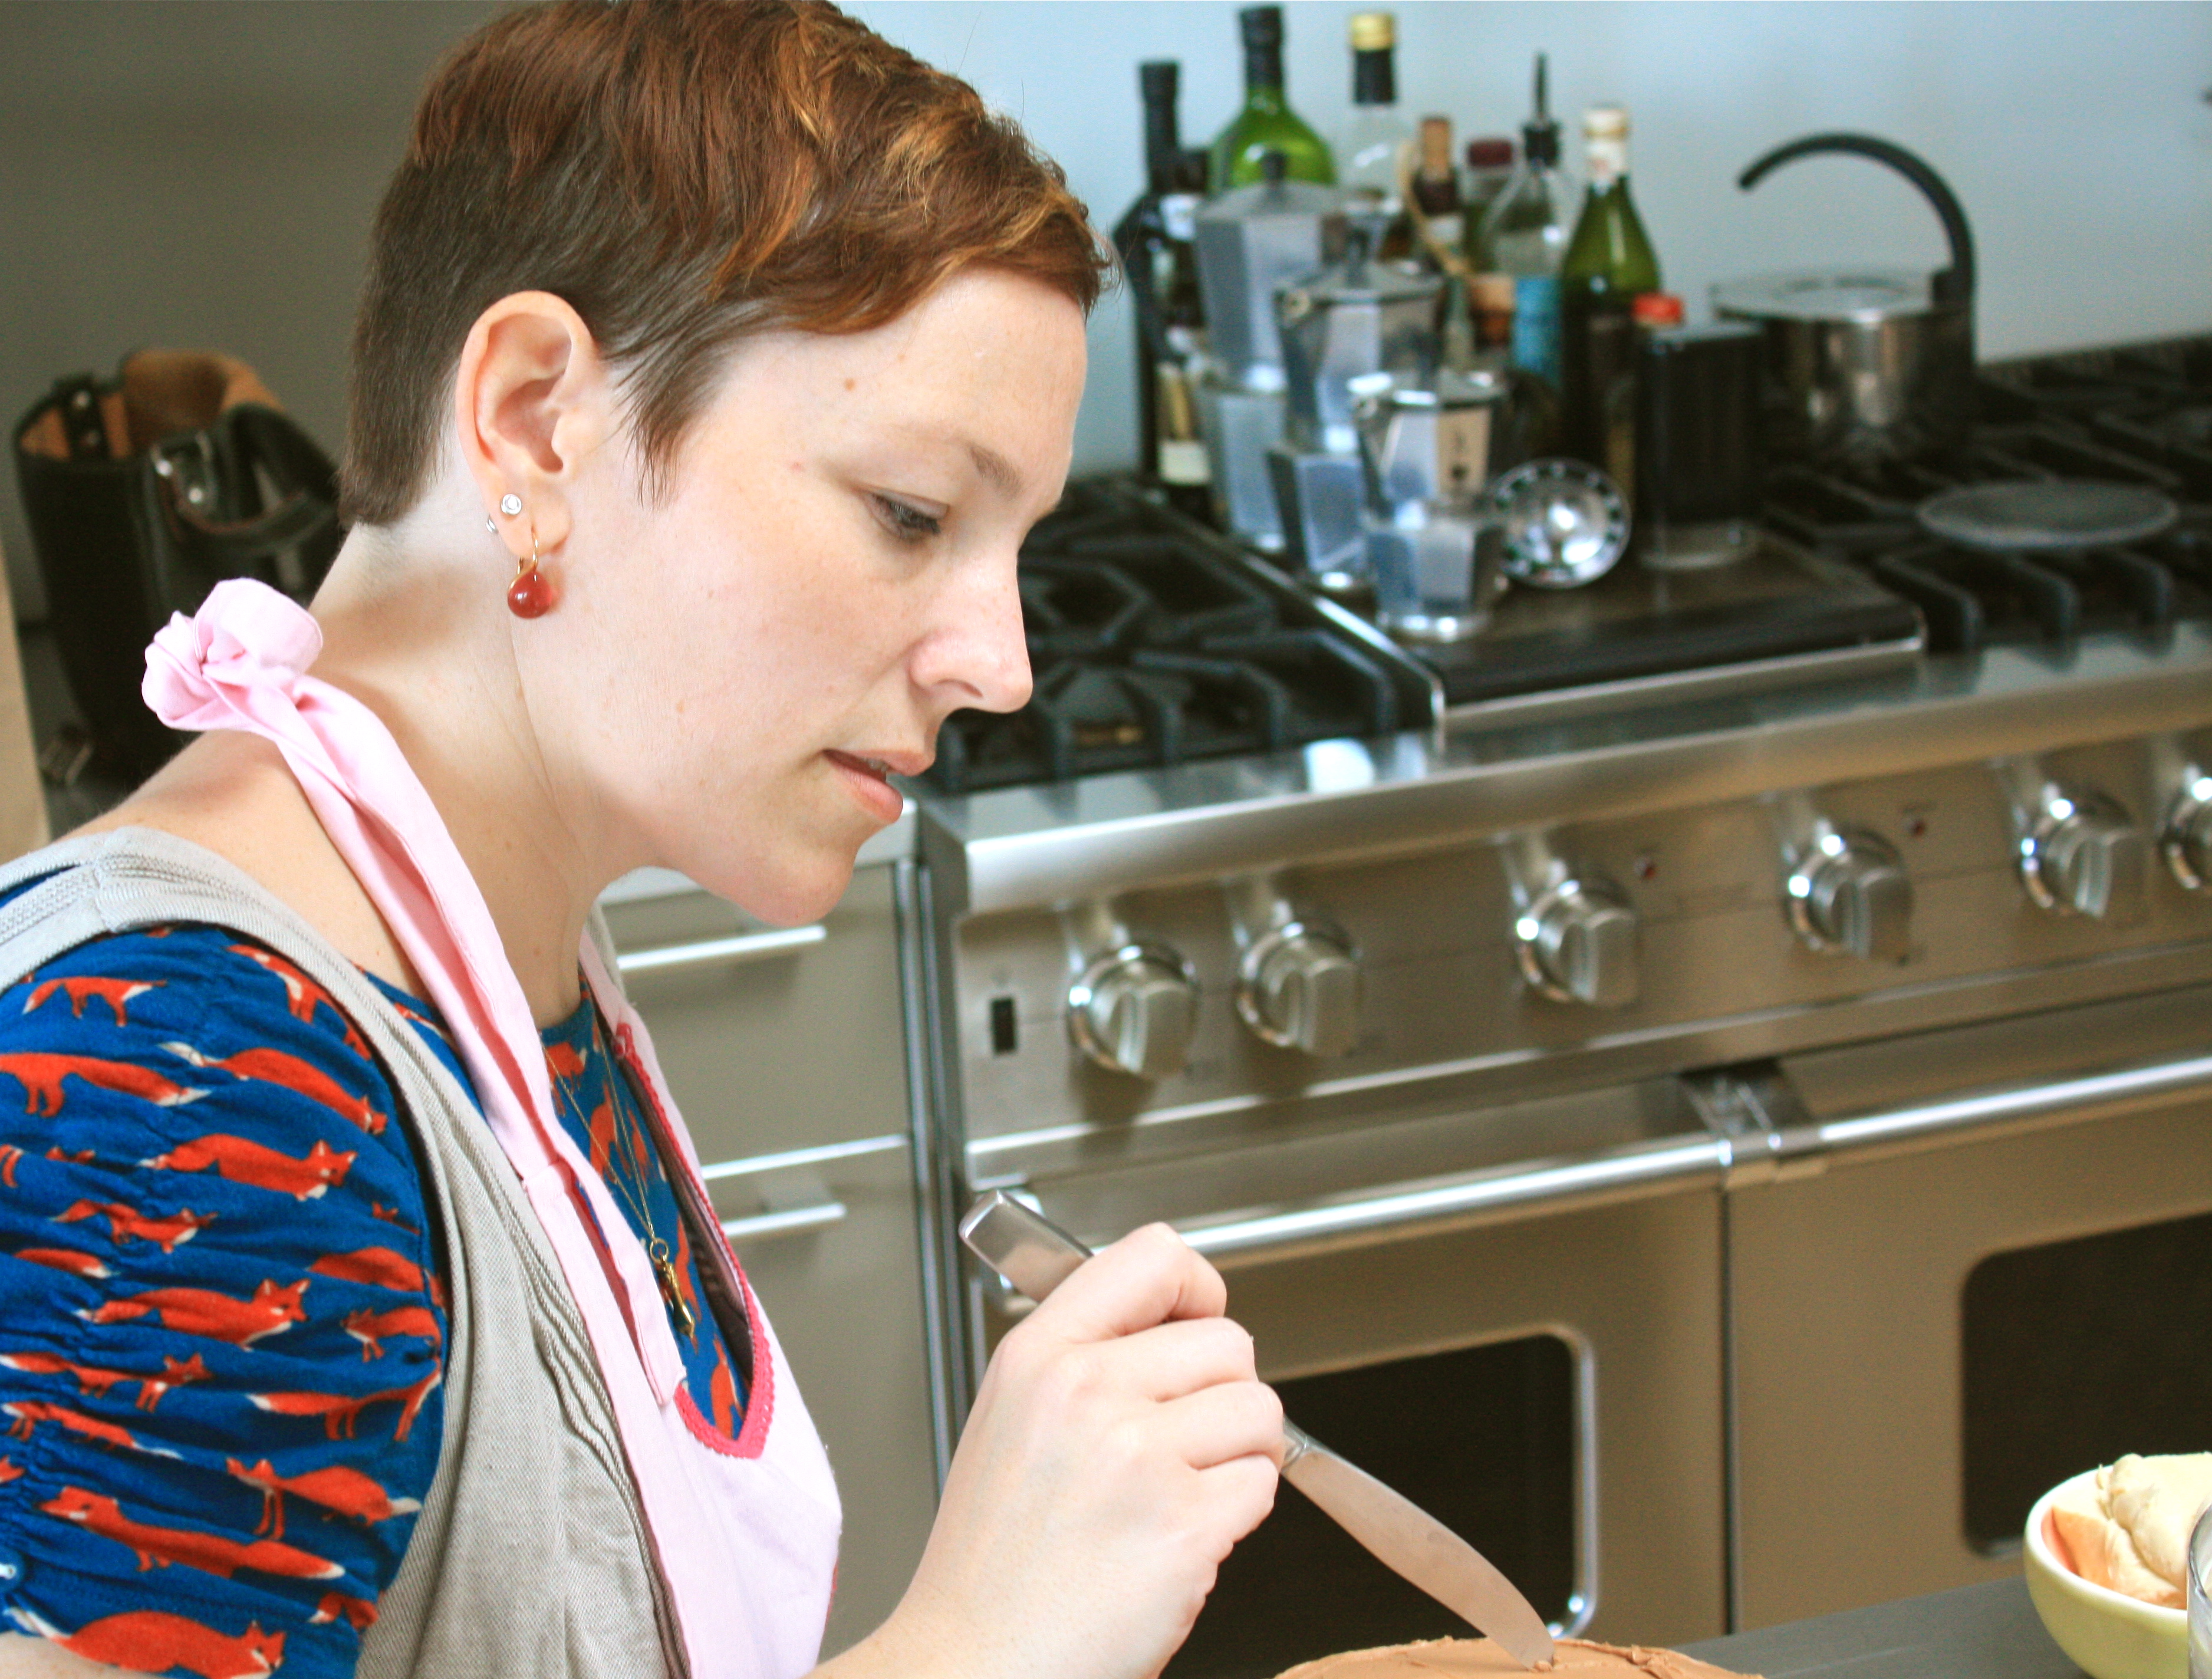
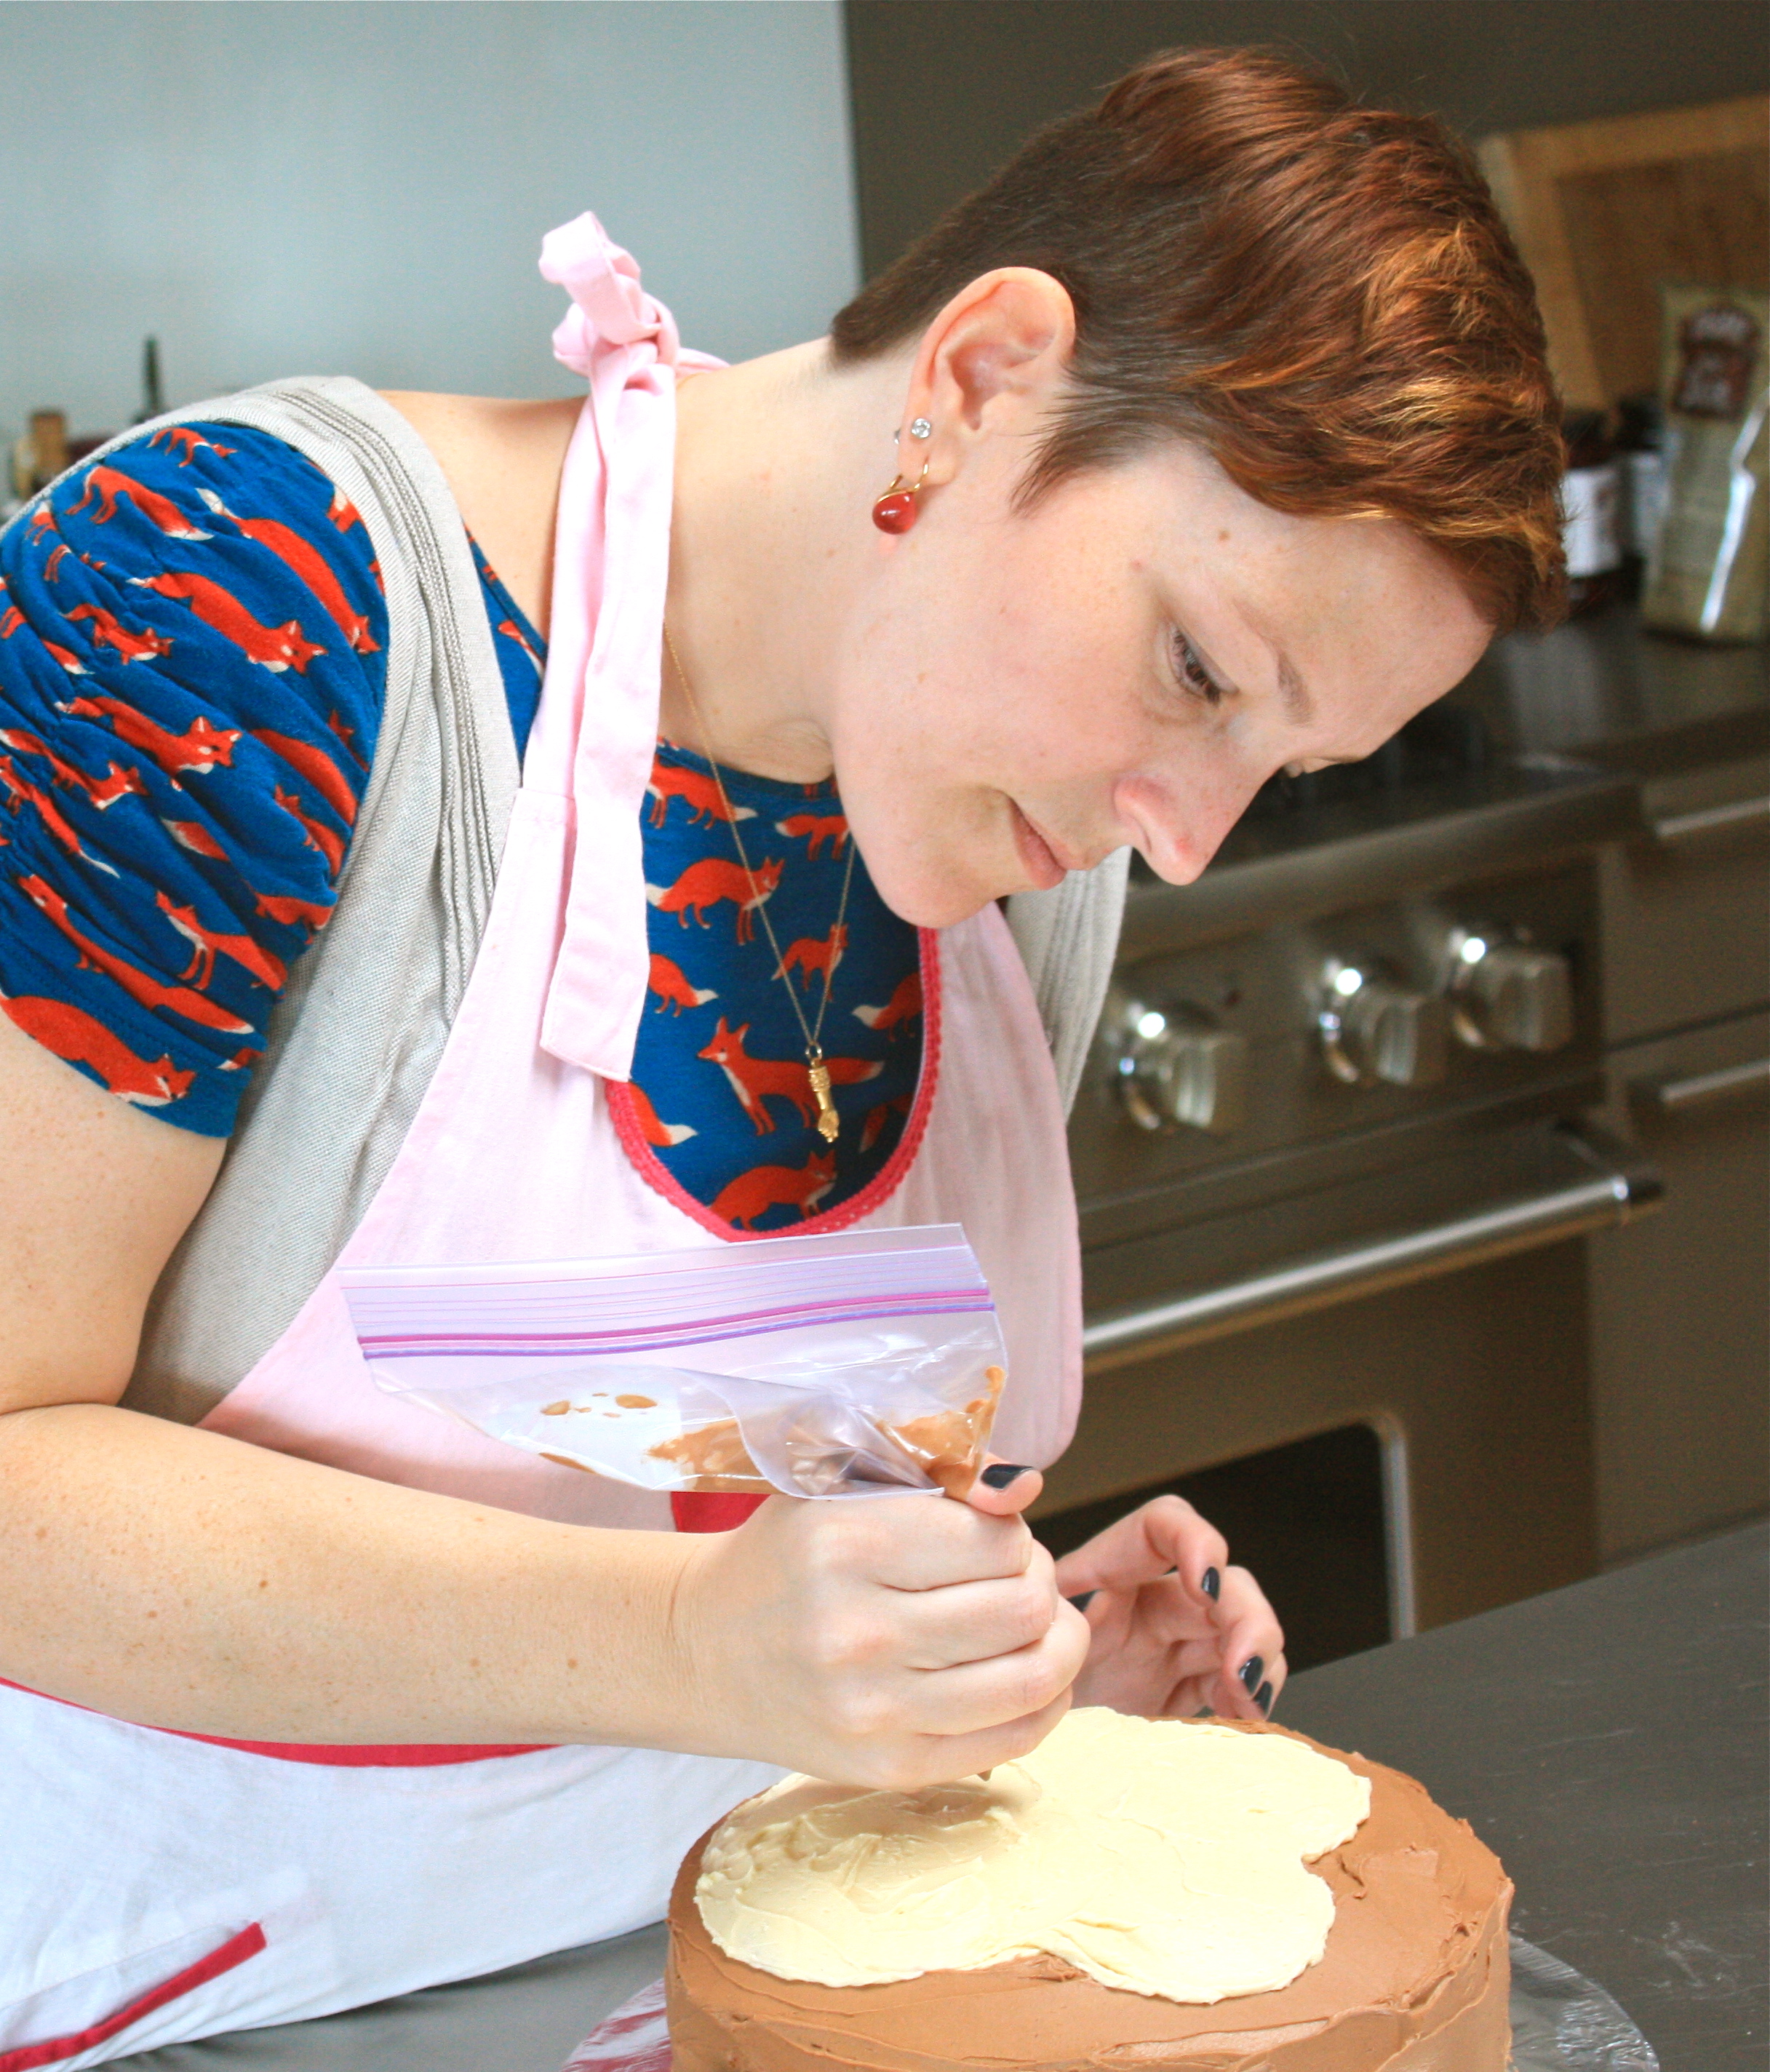
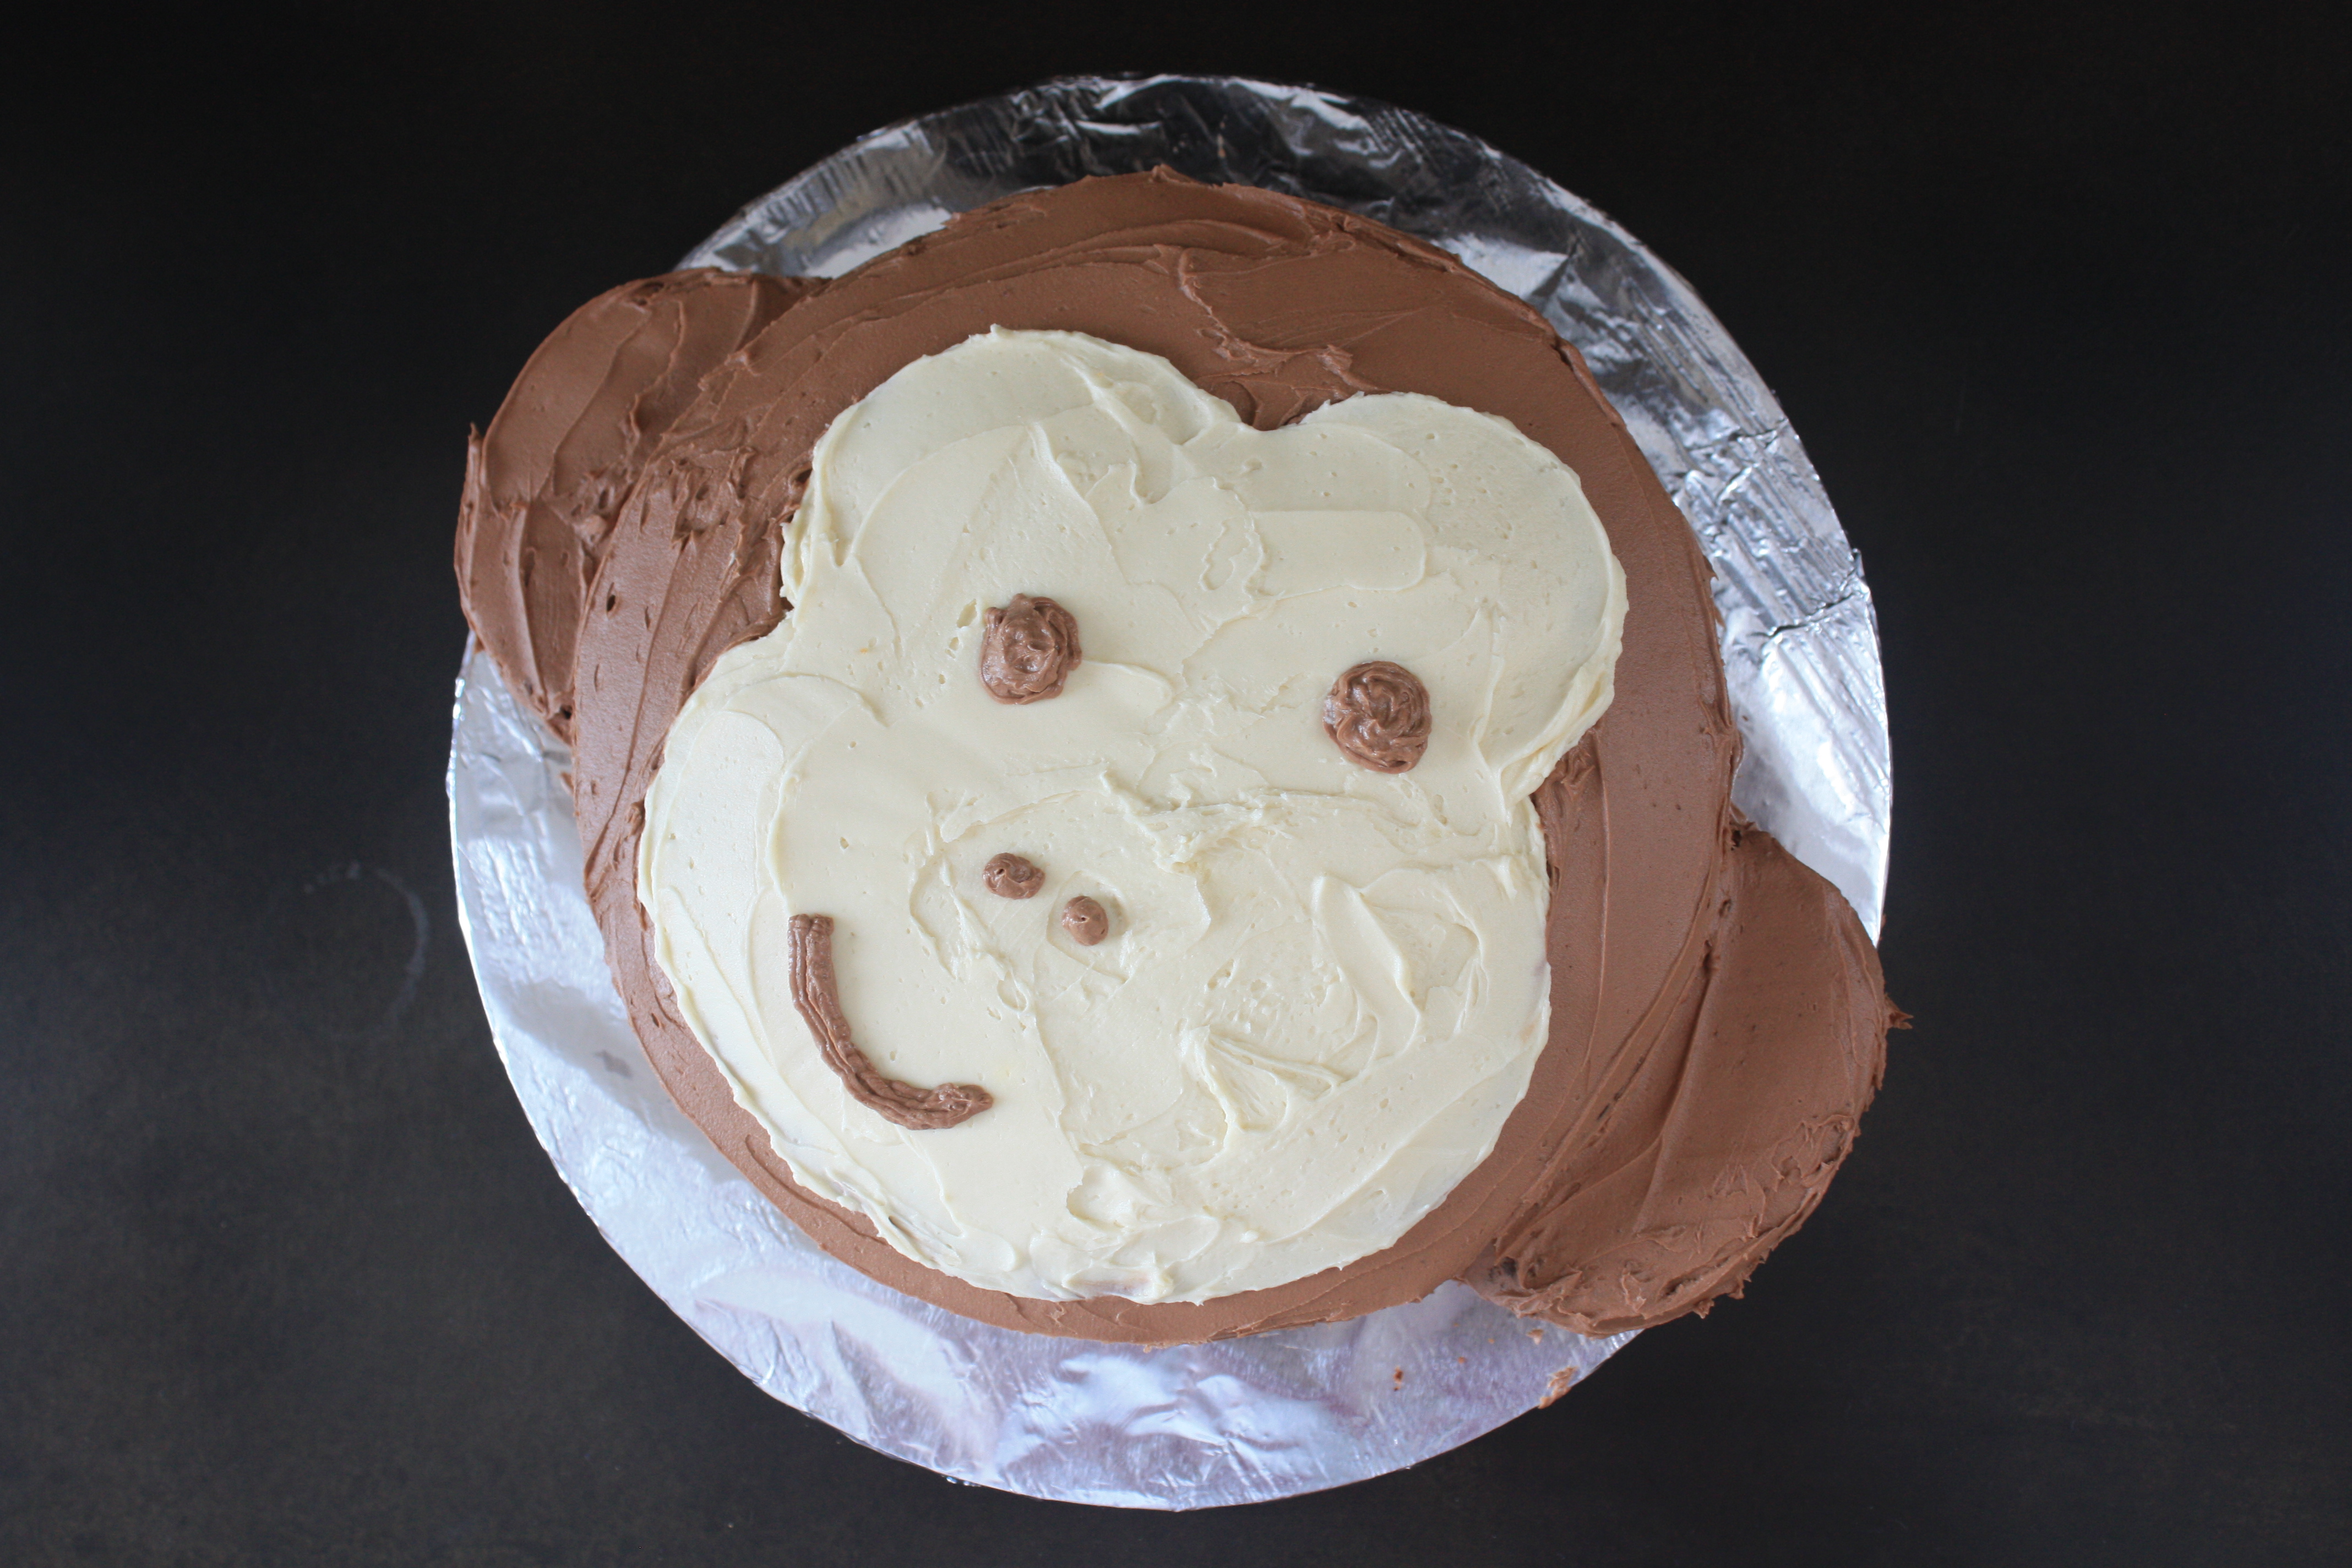
After an hour of chilling in the fridge (this really is an all day, relax-between-tasks-preferably-with-wine kind of a project), the cake was ready for me to put on its face! I started by sketching out the shape with a butter knife.
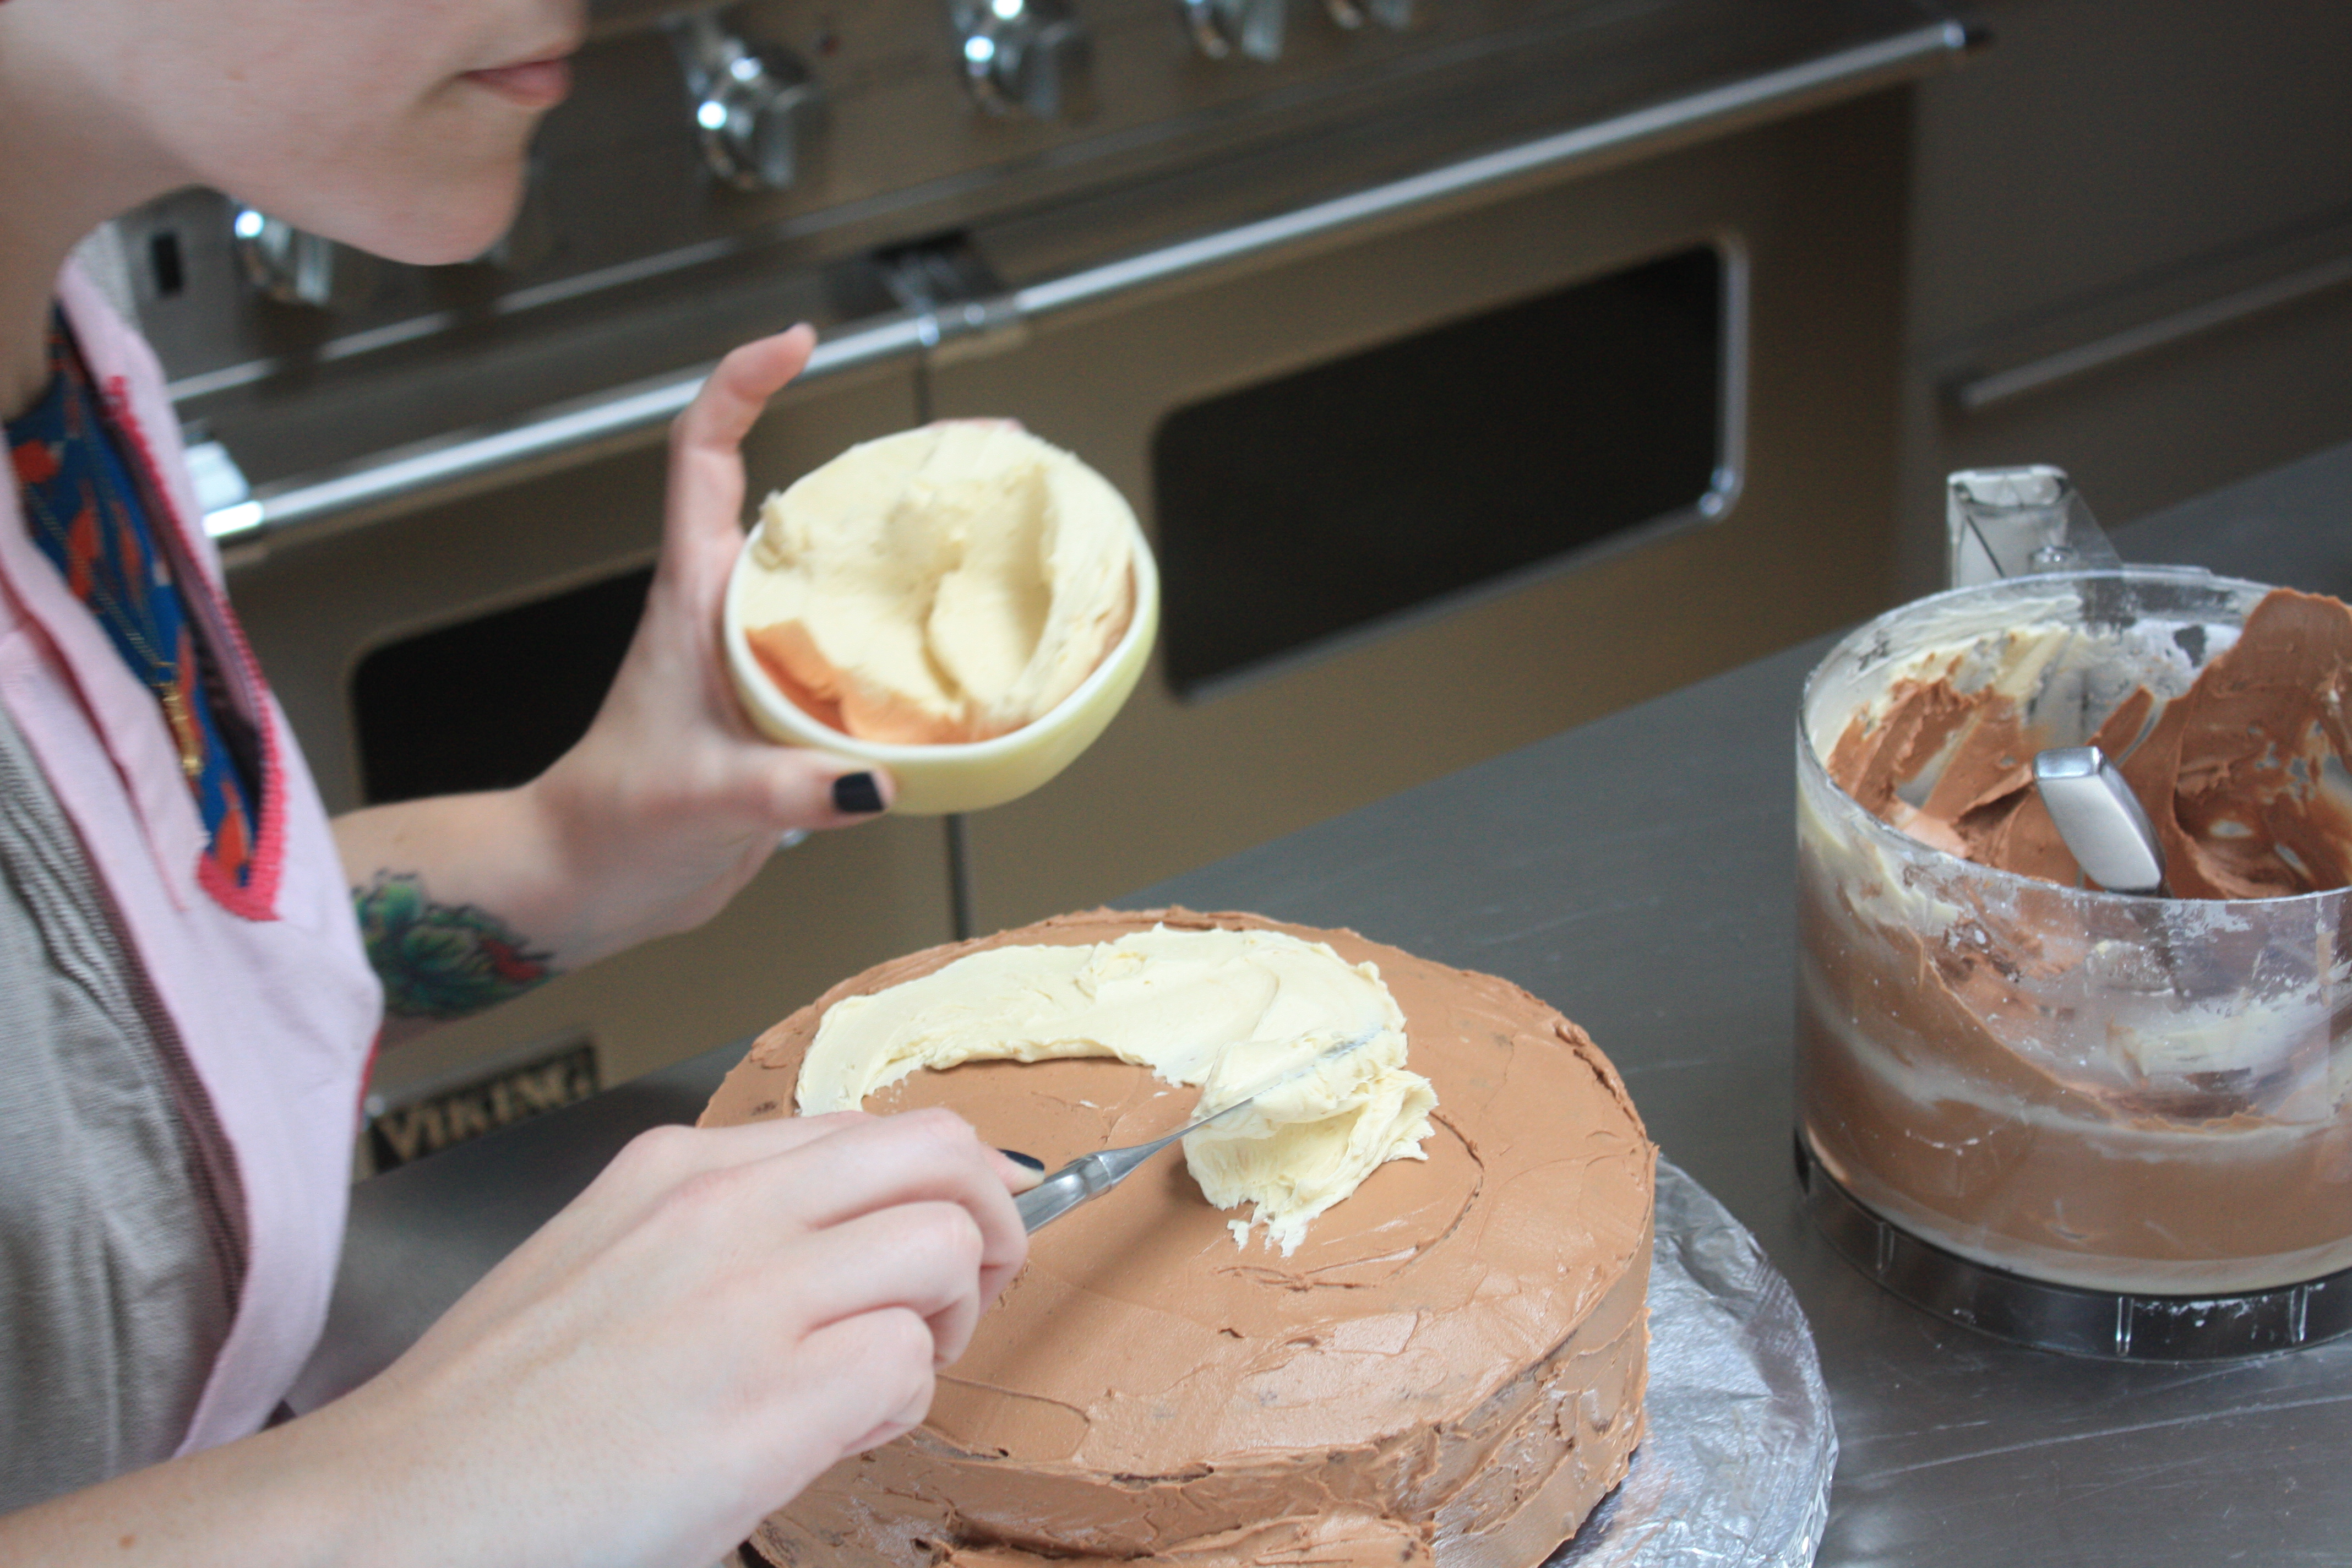
Then I filled that in with the white/cream-colored frosting I'd reserved (don't worry, that's all in the recipe/instructions below).
Then I smiled at the cake as it started to look more and more like an adorable little monkey (having a photographer to assist me means a lot more pics of my silly face; sorry about that).
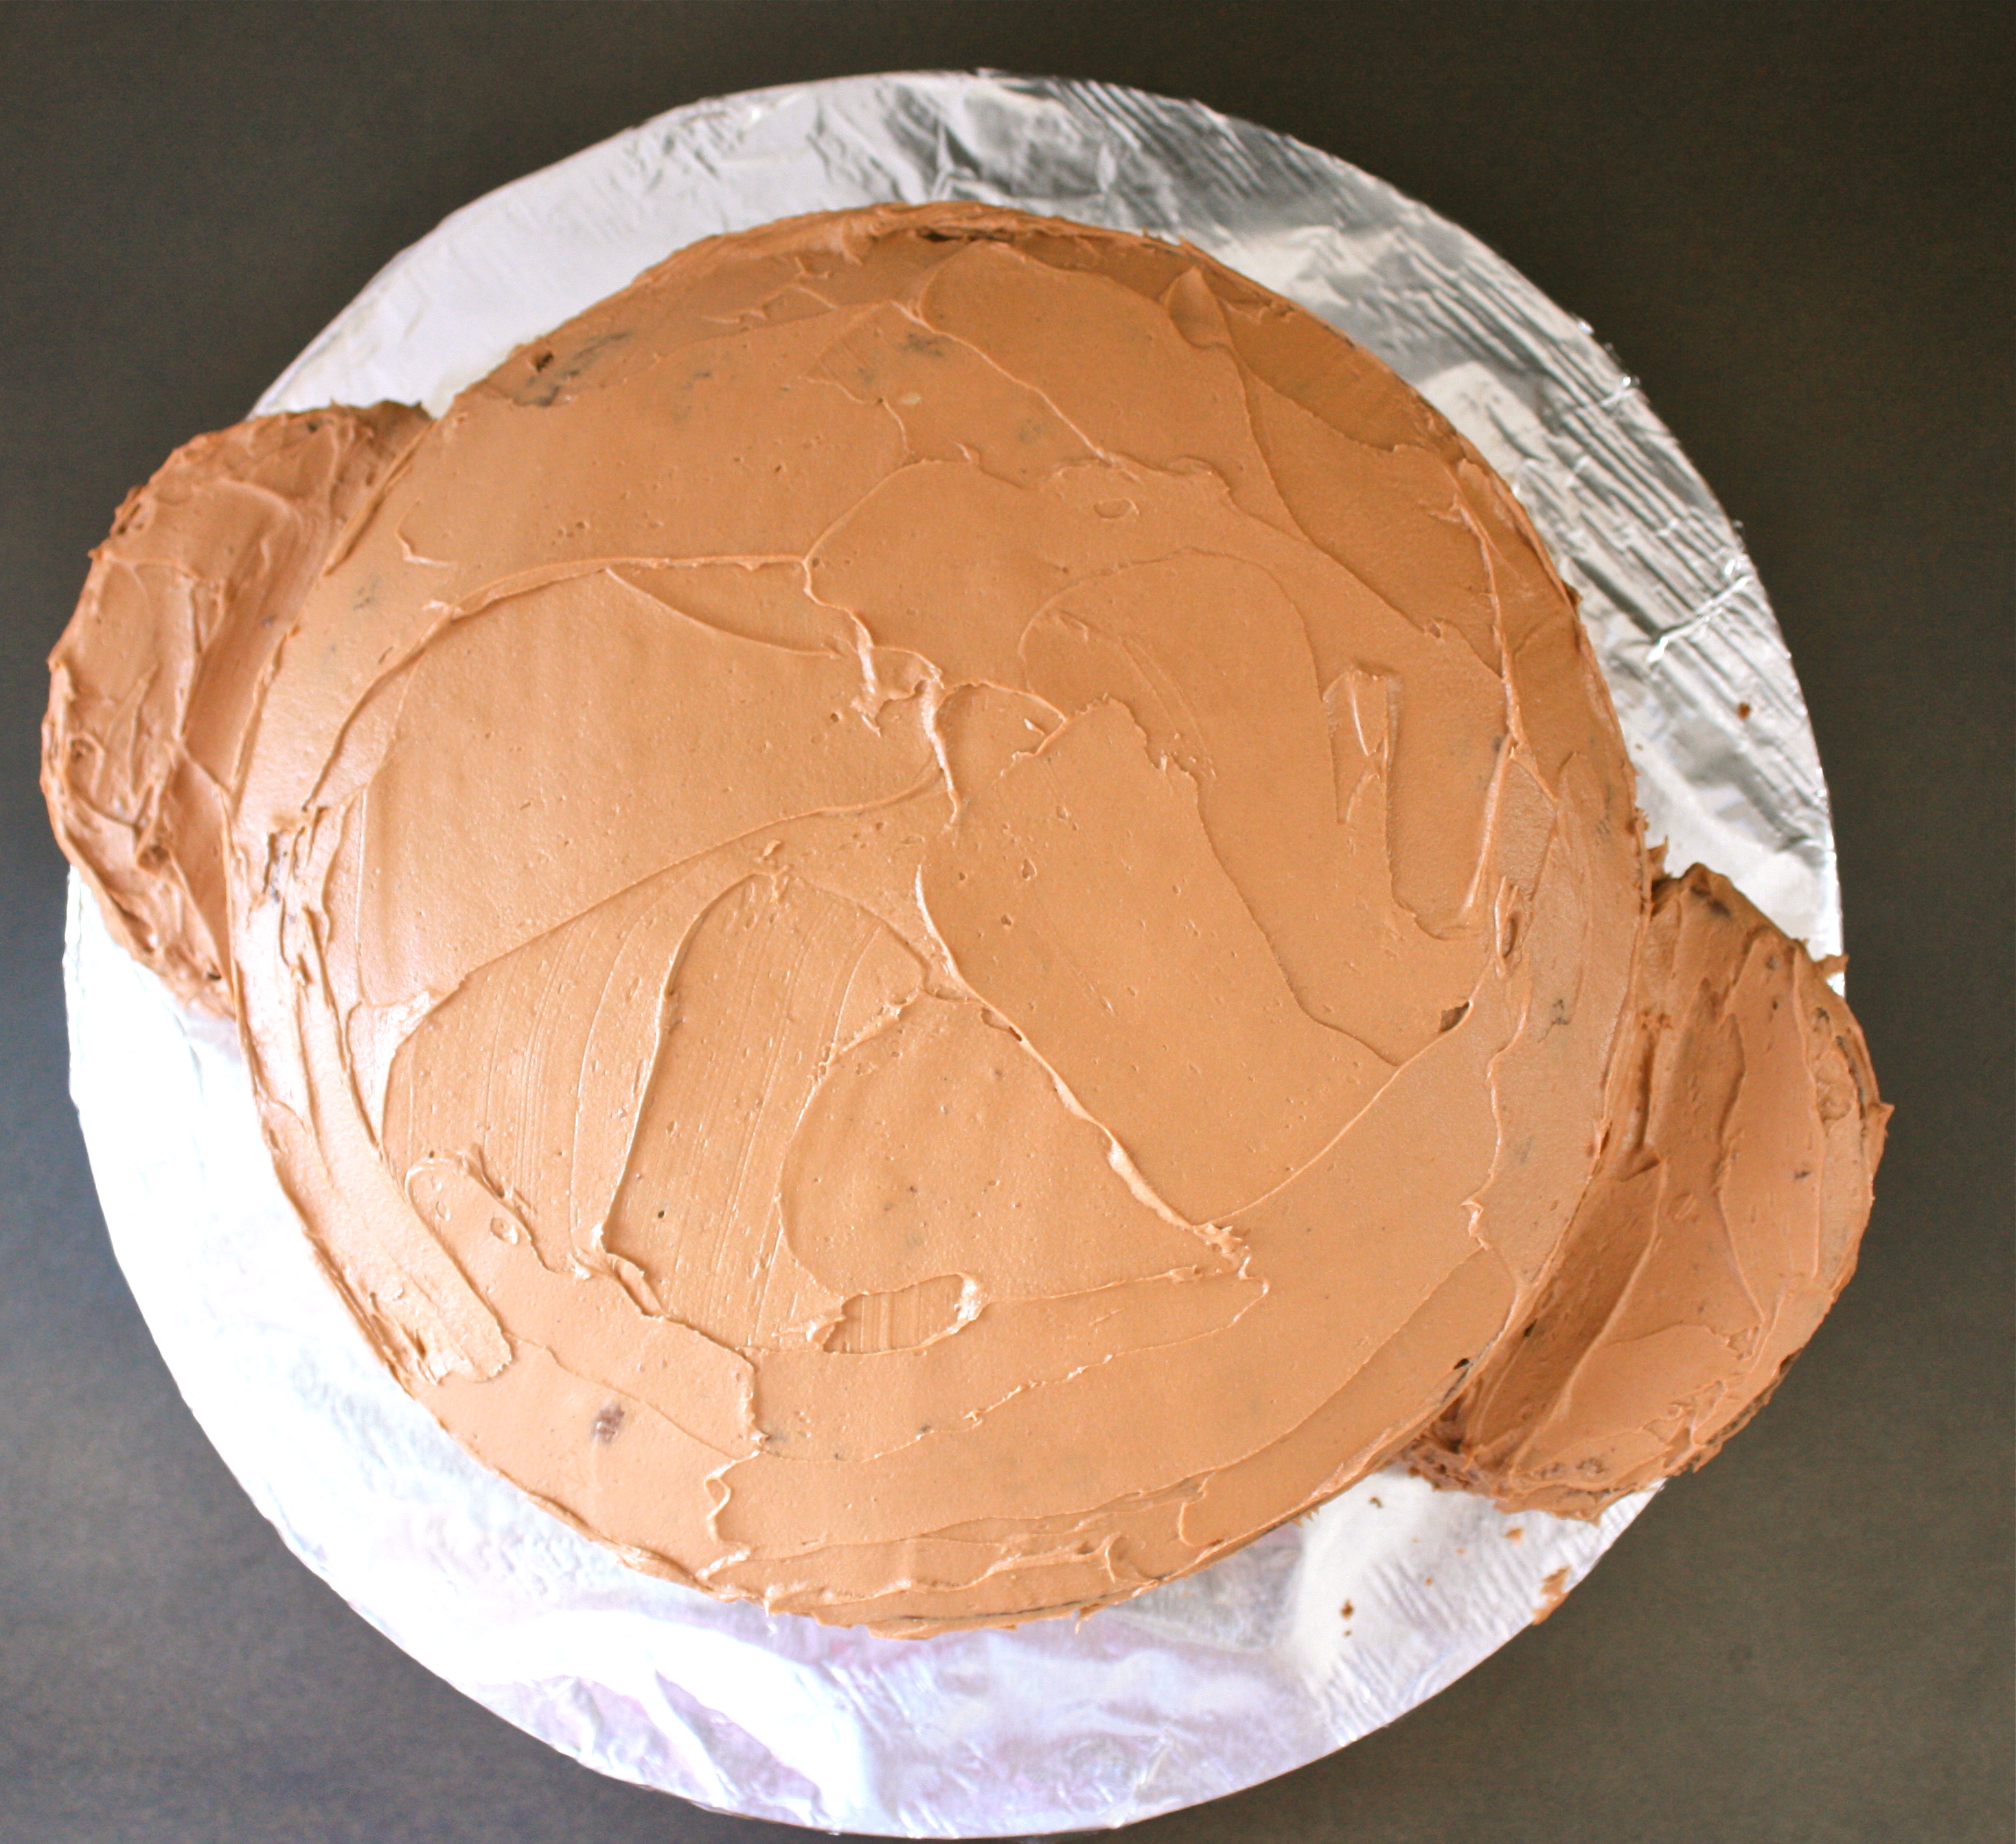
A little more chocolate frosting to finish up the sides and the rest of the head, and then it was time for the face!
This part was, in theory, super easy, but (surprise, surprise) I stressed over it a bit. I knew I could fix any errors with a little extra frosting but I find that decorations never look quite the same once they've been wiped out and re-done, so I really wanted to get it right.
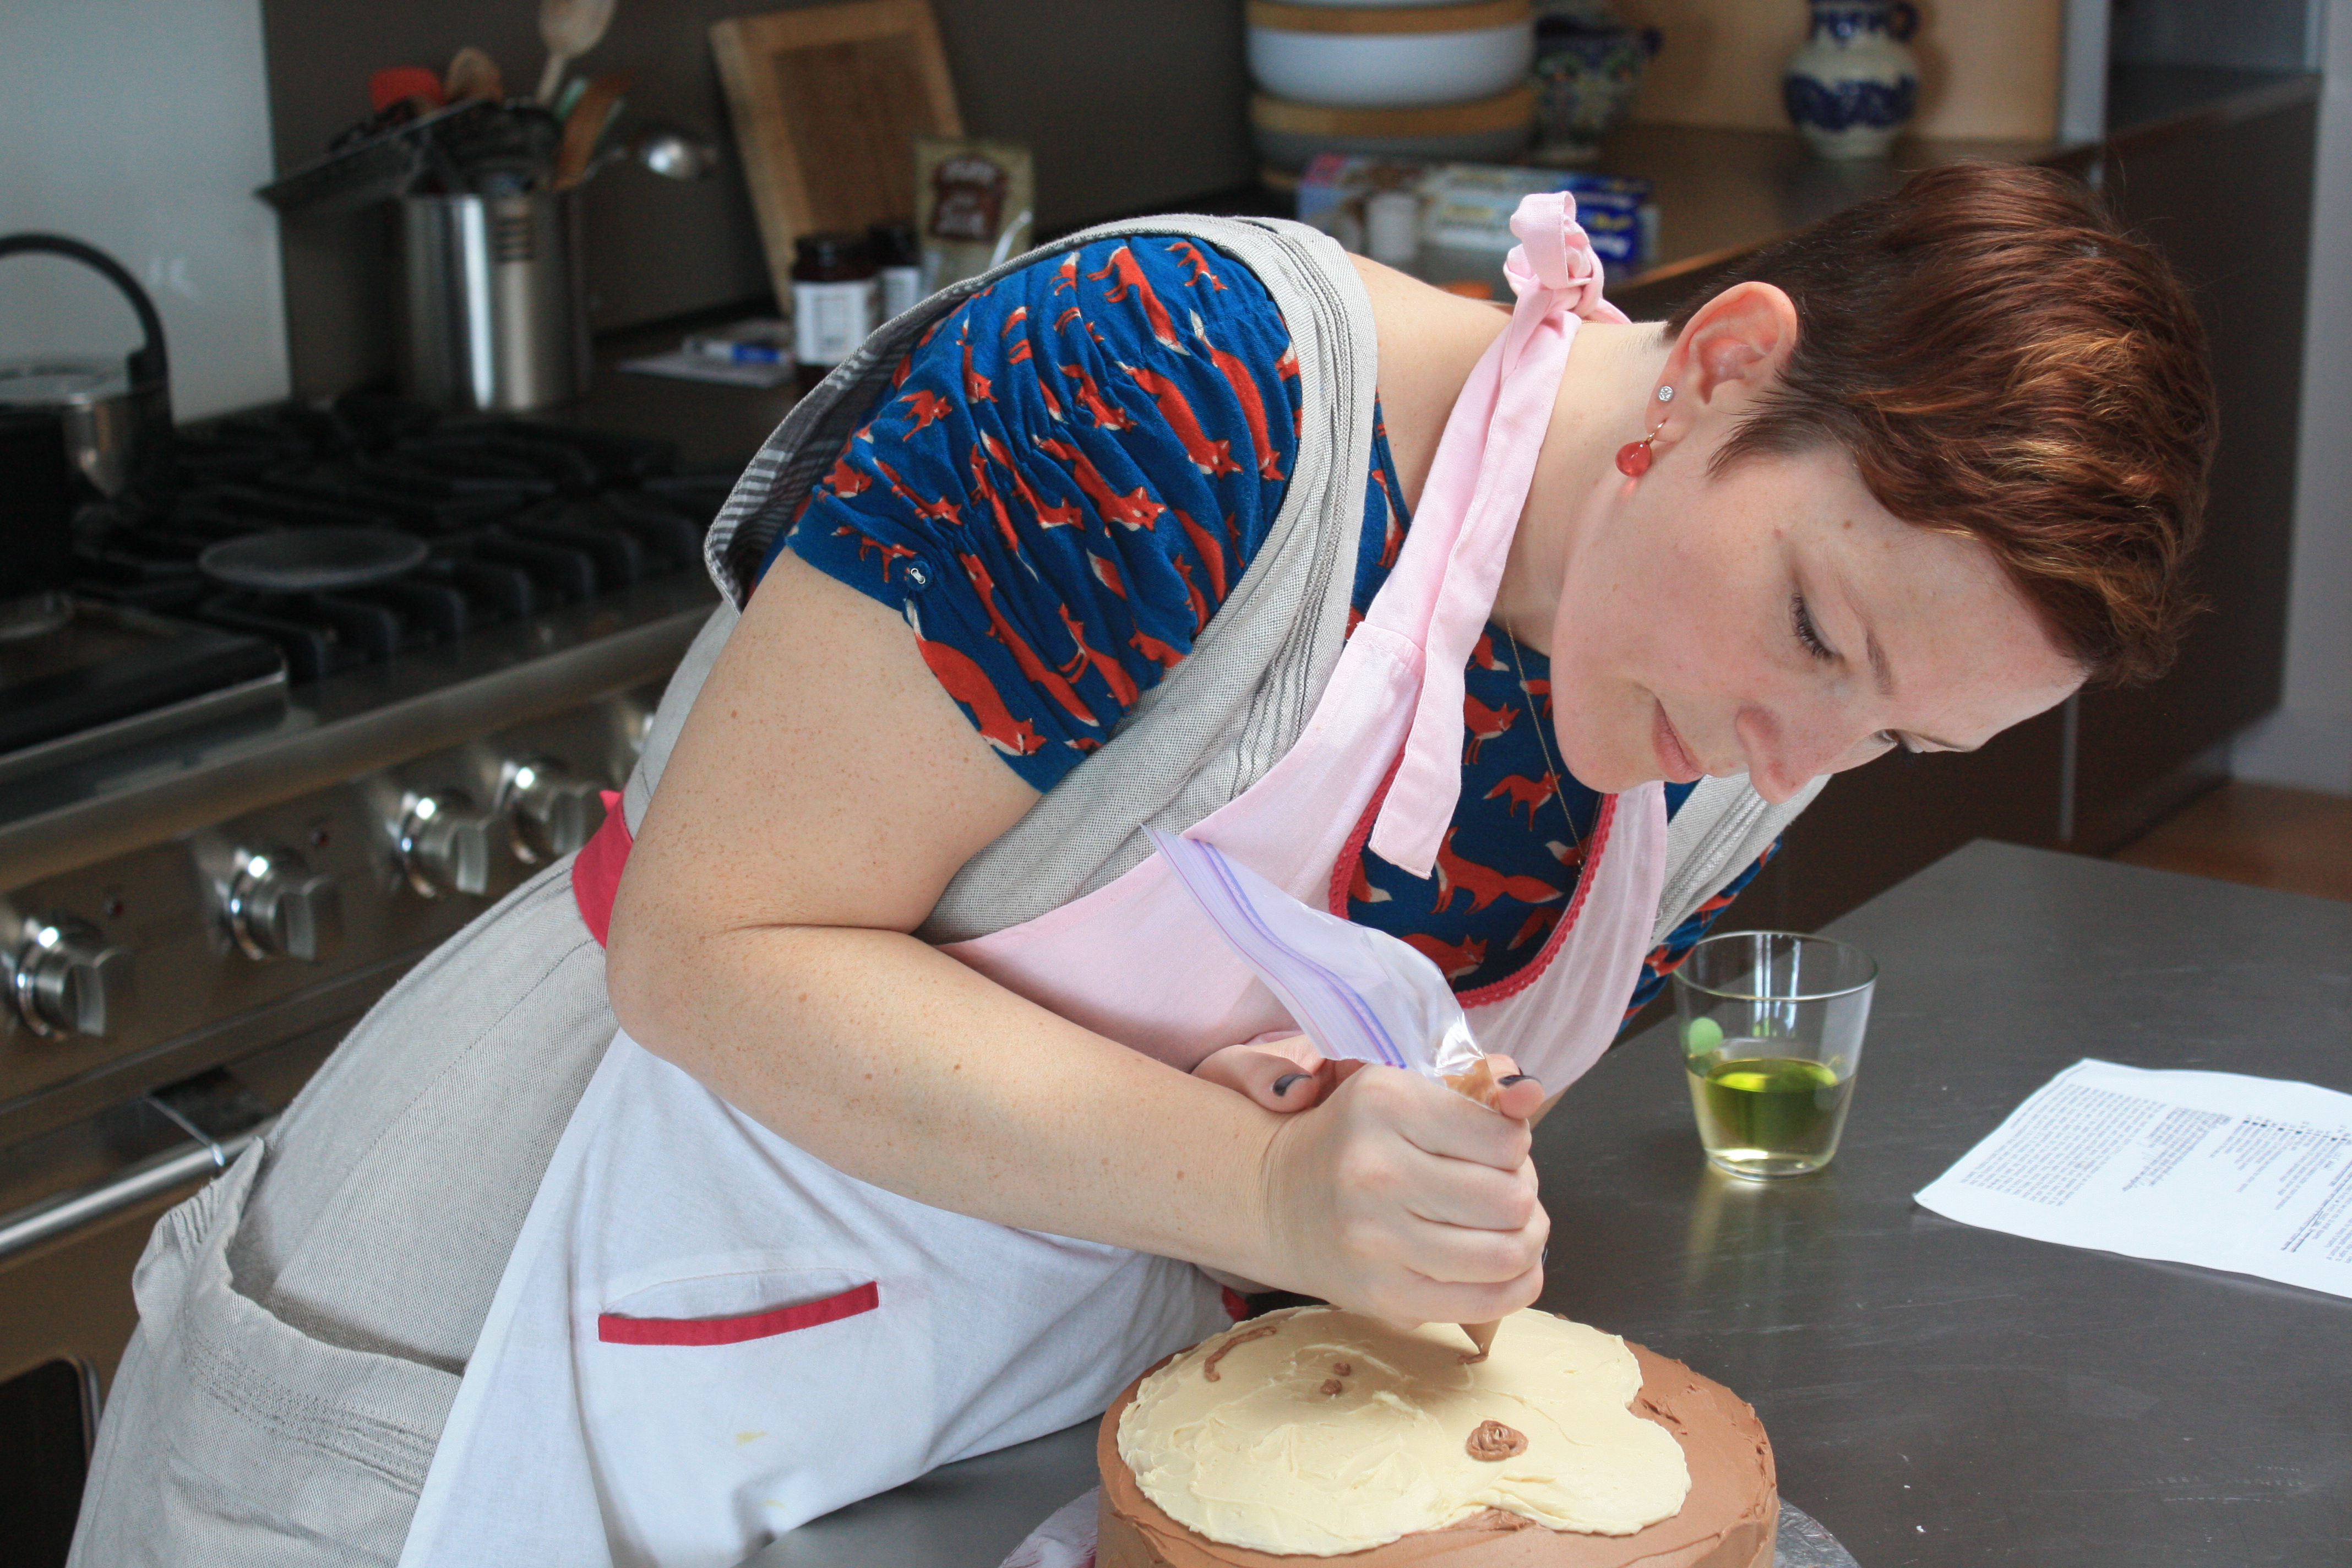
And I did! Well, okay, his face was a little sideways, but as my trusty assistant pointed out, a smirk is an appropriate facial expression for a cheeky monkey – plus it's my favorite emoji, so appropriate for me too ;)
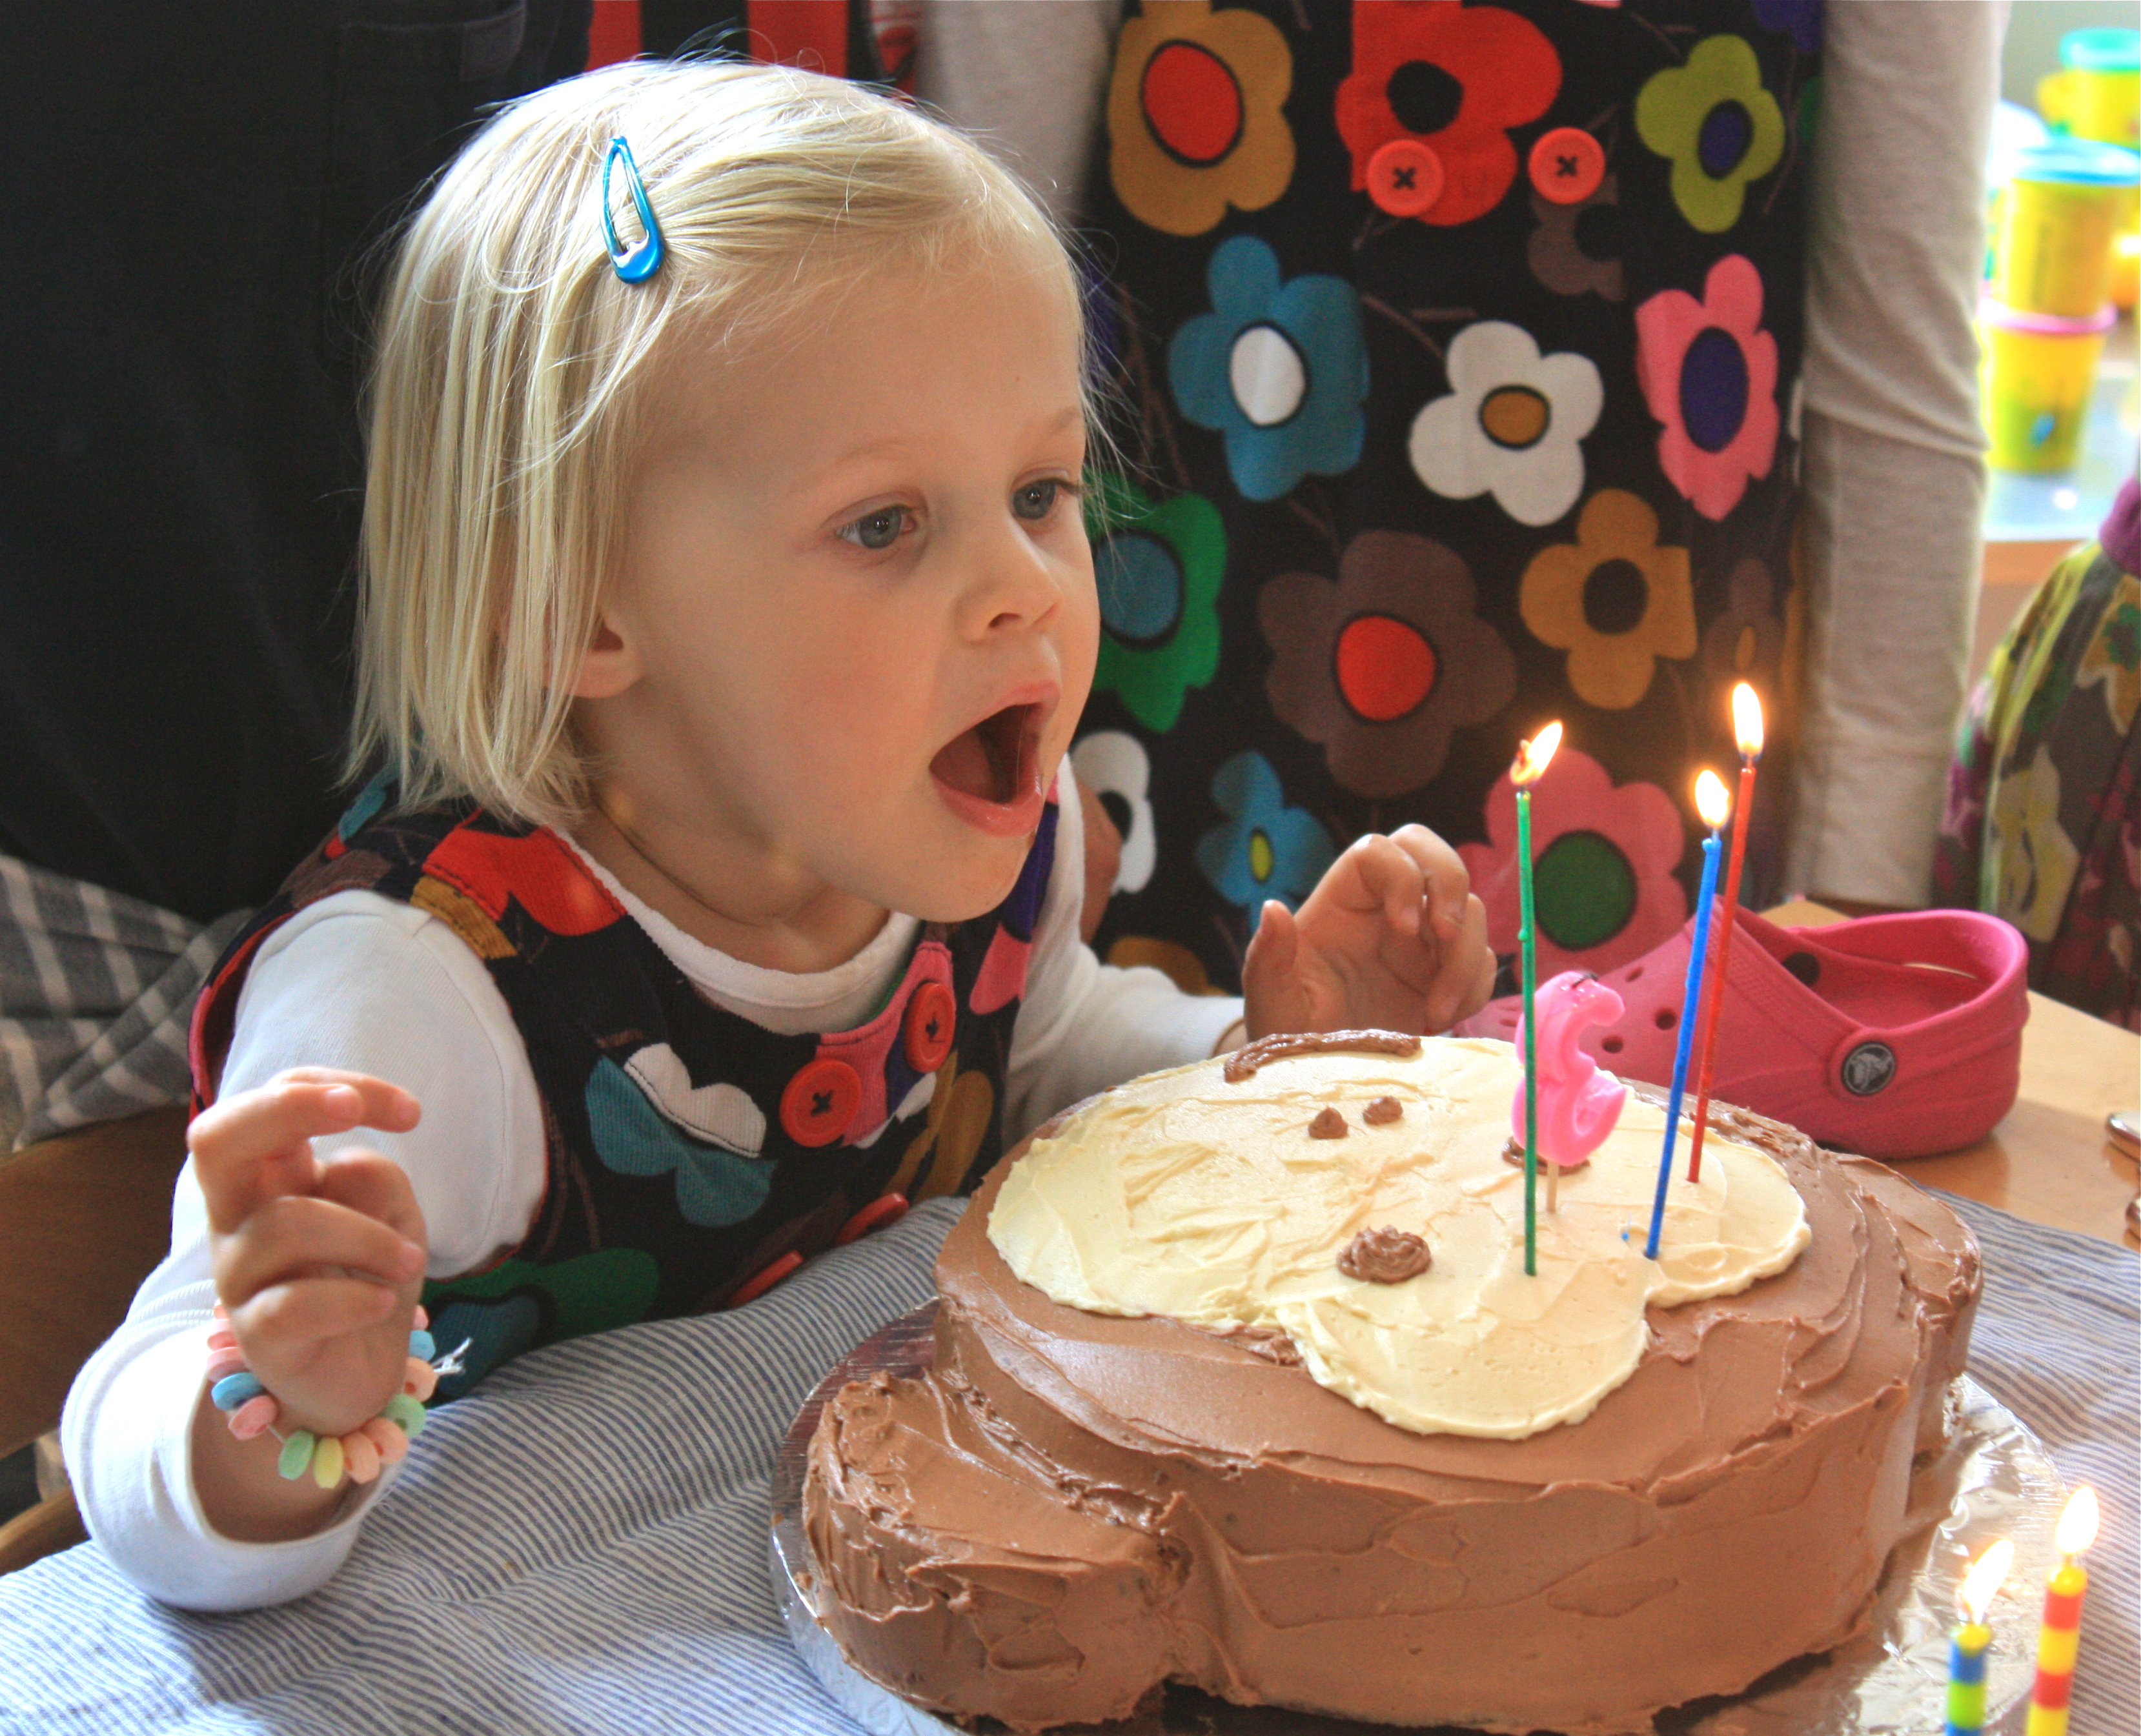
The birthday girl certainly didn't seem to think there was anything wrong with her monkey birthday cake – to be fair, her only comment was "it has a face on it!" How quickly kids forget what they specifically requested... But with toddlers, no complaint is a compliment, and all the adults were pretty impressed, so I was well chuffed with the way it looked.
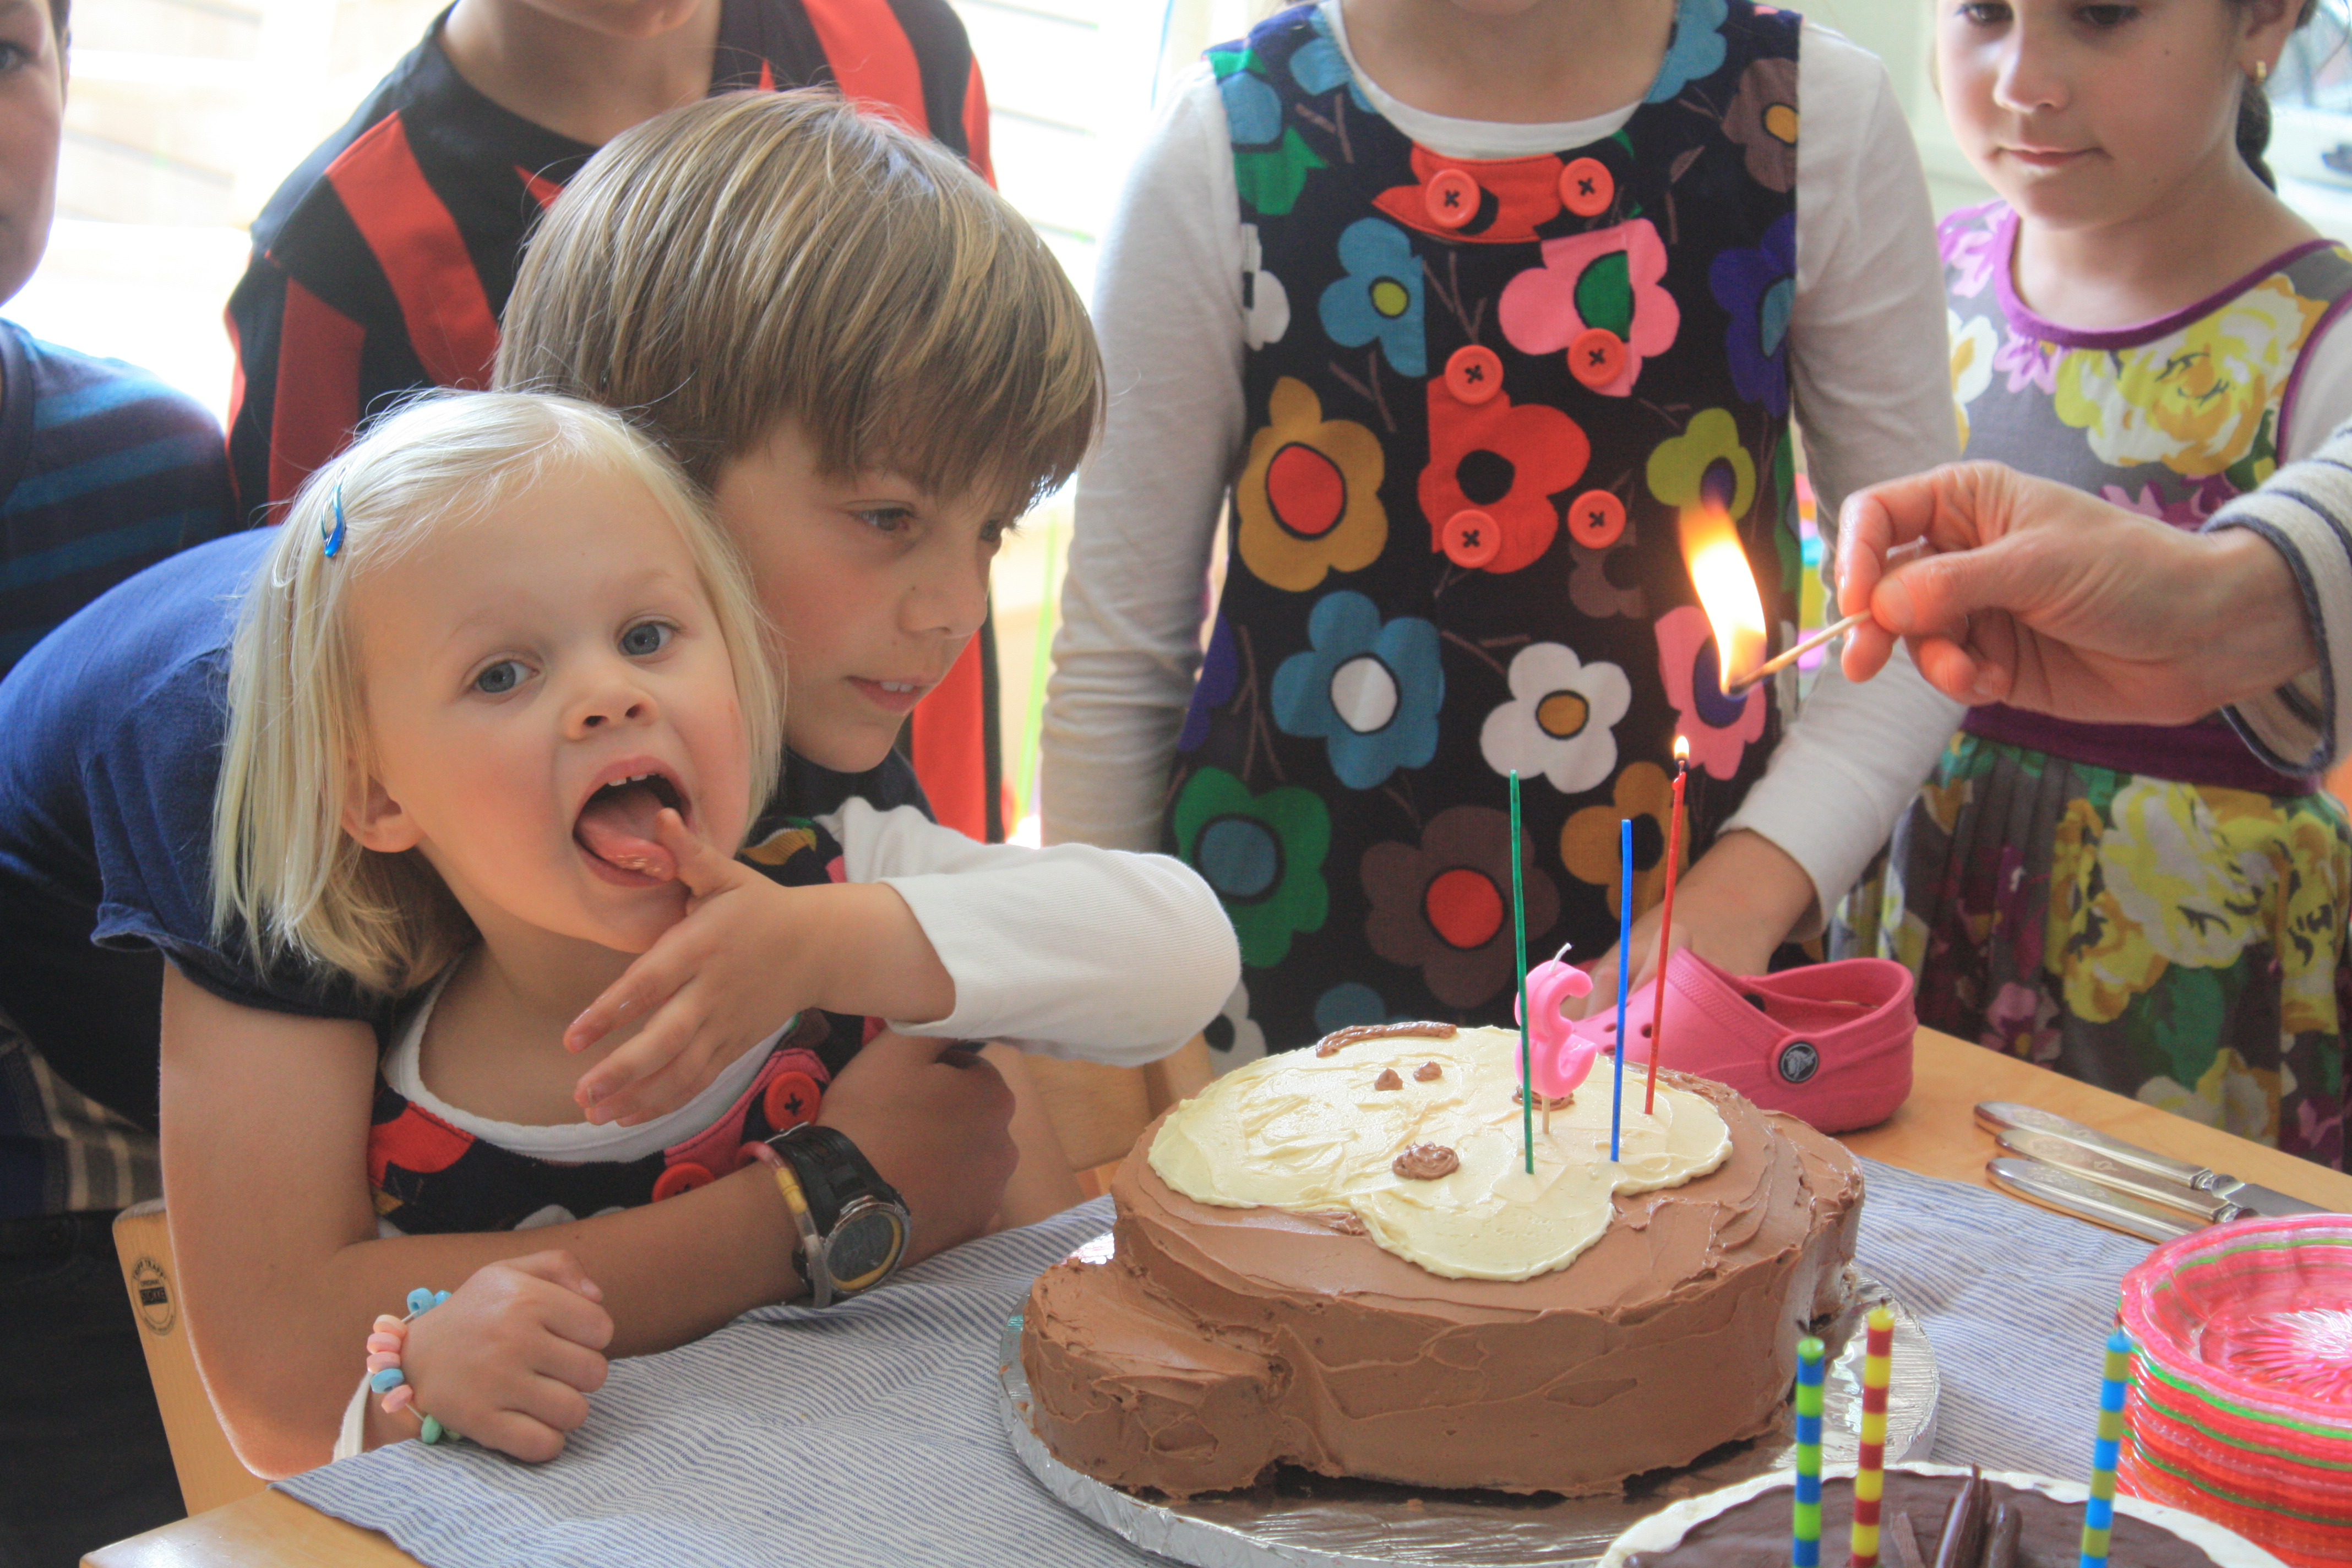
And it didn't hurt to watch people (especially one particularly cute person) enjoy the way it tasted, either!
All in all, while this cake took a long time to put together it was actually pretty easy to do, and I'd say it was a resounding success that will remain capuchin-ed in my memory for years to come!*
*I really couldn't let this post go by without even one monkey pun. Sorry I'm not sorry.
Chocolate Monkey Birthday Cake with Vanilla/Fudge Buttercream Frosting
To make your cakes (I tripled SK's original recipe to make three 8-inch layers, one of which I used for the ears)
Heat oven to 350°F/175°c and line the bottom of three 8in round cake pans (or two round and one square, which is what I had) with parchment, and butter the parchment and the exposed sides of the pans. In a large bowl with a hand mixer (or in a stand mixer) beat until fluffy:
18 tbsp (255g) unsalted butter, at room temperature
2 1/4 c firmly packed dark brown sugar
6 tbsp granulated sugar
2 1/4 c firmly packed dark brown sugar
6 tbsp granulated sugar
Scrape down the bowl and add, beating until combined:
3 large eggs
3 large egg yolks
3 large egg yolks
3 tsp vanilla
Add, scraping the bowl down and mixing well (don't worry if the batter looks a bit uneven):
2 1/4 cup buttermilk
Sift over the batter (or whisk together in a separate bowl and then sprinkle over batter):
1 1/2 c Dutch cocoa powder
3 c all-purpose flour
3/4 tsp baking soda
1 1/2 tsp baking powder
1 1/2 tsp table or fine sea salt
3 c all-purpose flour
3/4 tsp baking soda
1 1/2 tsp baking powder
1 1/2 tsp table or fine sea salt
Stir gently until just combined, scraping down the bowl as necessary. Divide batter among prepared pans and smooth flat with a spatula, then bake 20-30 minutes, until a toothpick inserted into the center of each cake comes out with just a few crumbs clinging to it. Let the cakes cool in the pans for 5-10 minutes, then flip them out and let them cool completely on a cooling rack (I let them cool completely in the pans but you know what I say about doing as I say, not as I do – turned out fine, though) before cutting out ears or frosting the layers.
Once the cakes have cooled completely, put the 'ears' layer in the freezer to make carving easier and start on your frosting.
To make your frosting (makes about 5c)
In a food processor (remembering to lock everything in place and secure the blade BEFORE putting all your ingredients in – duh), whirl until smooth:
4 1/2 c powdered sugar (no need to sift)
1 1/2 c (3 sticks or 341g) unsalted butter, room temp
6 tbsp half-and-half or whole milk
1 tbsp vanilla
6 tbsp half-and-half or whole milk
1 tbsp vanilla
Set aside about 3/4c for the monkey's face, then whirl in until light and smooth:
5 oz (142g) unsweetened chocolate, melted and cooled (I used semisweet and it was fine)
If you're not going to make the cake right away, or if your kitchen is hot, be sure to put the frosting in the fridge to firm up periodically. I didn't have any trouble working with it at room temp but it wasn't super hot that day.
To make your monkey
To make your monkey
Once your 'extra' layer has gotten firm in the freezer, cut a circle – I went with about 4-5 inches in diameter – out of the center and then cut that circle in half. These will be your ears. If you want them to sit flush against the sides of the monkey's head (if you're a little neurotic, as I am), carve a gentle curve in the flat side of each ear.
Place one of the 8in rounds bottom-up on a serving platter (if you're more neurotic than I am, slip scraps of waxed paper underneath, all around, to keep your platter clean as you decorate). Frost the top of the round generously with the chocolate frosting, coming just shy of the edges of the circle, then place the second round right-side-up on top of it. Frost the rest of the two-layer cake, then 'glue' the ears to the sides with more frosting and finish off the crumb layer. Stick the cake in the fridge to firm up for 30-60 minutes.
I did the face next, but what I should have done first was the second layer of chocolate frosting, so that's what you should do. Be sure to reserve a small amount to draw the facial features later.
Once you're ready to shape the face, you can sketch the outline first with a butter knife to give yourself a frame within which to work (if you're notorious for messing up perspective halfway through, as I am), or you can just go for it. Use the off-white frosting to draw a sort of Mickey Mouse-type shape for the monkey's face (see photos above), frosting generously.
Use your last bit of chocolate frosting to draw a nose, eyes, and mouth on the cake – I used a ziploc baggie with the tip snipped, but a piping bag would likely work even better. Don't get too perfectionist with it! Remember, this cake is supposed to look homemade.
Keep the cake in the fridge until you're ready to carry it into the party and hear everyone ooh-ooh-ooh and ahh over it.
No comments:
Post a Comment
I love hearing from you guys, so if you have a question or a comment, or even just a random outburst like OMNOMNOM, please post it here!